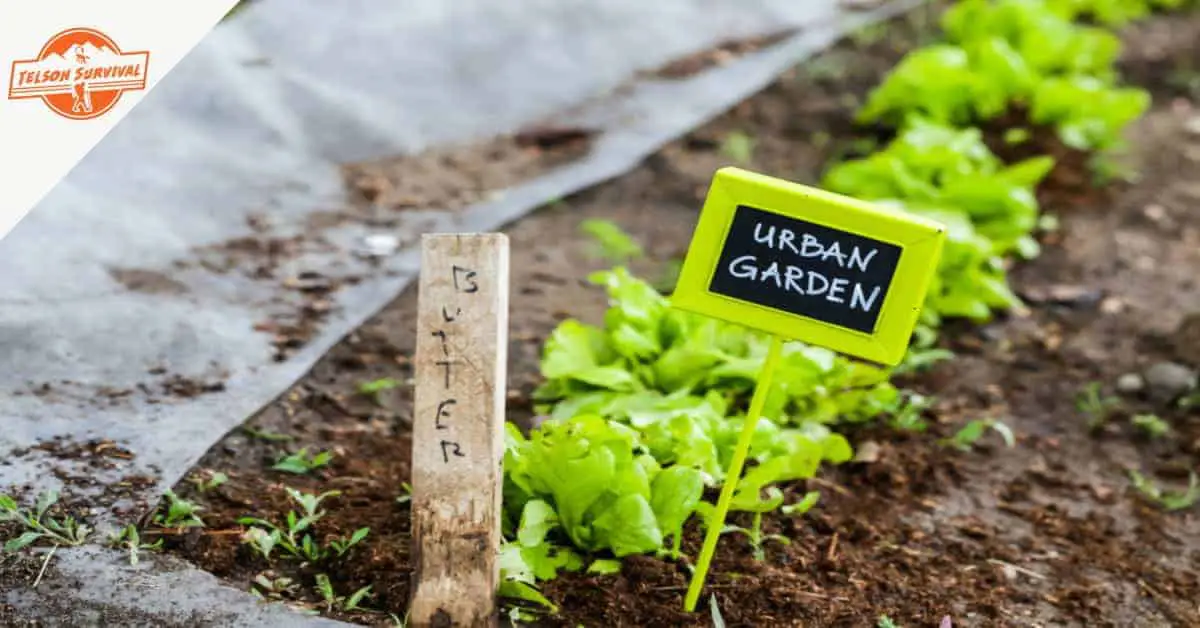
By starting an urban survival garden, you are tackling an immediate problem that impacts your life. You are also actively prepping for harder times ahead!
Telson Survival is a participant in the Amazon Services LLC Associates Program, an affiliate advertising program designed to provide a means for sites to earn advertising fees by advertising and linking to Amazon.com.
Telson Survival is supported by its readers. Please assume all links are affiliate links. If you purchase something from one of our links we make a small commission, at no extra cost to you. This helps us pay for the running of this website. Thank you for your support!
Life in the city has its benefits. Otherwise, why would more than 50% of the world’s population choose to live in urban areas?
Being close to your job, healthcare, access to different markets, cultural events, diversity, and educational centers are defining factors that most people appreciate about city life.
But it also has its disadvantages.
As any city dweller can tell you, space is at a premium. There’s not a lot of it, and it is shared by many people.
For many folks, it’s also a problem that many urban centers are essentially food deserts. Fresh produce can be hard to find and expensive when you do.
Can you imagine how hard it will be to find fresh food when SHTF, the grid goes down, or transportation collapses?
When you start an urban survival garden, you are taking on an immediate problem that impacts your quality of life. At the same time, you are actively prepping for harder times ahead.
As an urban prepper, you already know that preparing for the unexpected requires action now.
If you’ve never been much of a gardener but are interested in the idea of starting an urban survival garden, this informational guide is for you.
There are a lot of challenges to starting an urban garden, but none of them should stop you from enjoying the literal fruits of your labor.
One of these challenges is misinformation.
On most prepper websites, the information about how to have a survival garden is downright misleading. To an experienced gardener, it’s obvious that some of these people who wrote these articles never planted a seed in their life.
On traditional gardening websites, there is a complete lack of information on how to do things in a survivalist way. They just assume things will always be the way they are. You’ll find an abundance of “buy this” and “buy that.”
But let’s be honest with ourselves.
When SHTF you won’t be able to just run out to the store to buy more seeds or potting soil.
Besides, your home or apartment is probably too small to build up a sizable cache of potting soil and gardening supplies that will eventually run out anyway.
If you want to have the best urban survival garden, you need to know how to grow food without counting on commercial products.
In this informative guide on how to start an urban survival garden we’ll discuss:
Creative solutions for planting in small spaces.
Opportunities to plant elsewhere in the community.
What plants need to grow and produce.
How to make your own potting soil and fertilizer.
Effective pest control techniques.
The best urban survival garden crops.
How to produce your own survival seeds.
And more!
In a hurry? If you just want to get to our conclusions, here are our top picks and recommendations!
This is the big question that has brought you to this article. The simple short answer is to just do it.
The long answer to this question is more questions.
The first thing you need to do to create your survival urban garden is to analyze the growing space that you have available to you.
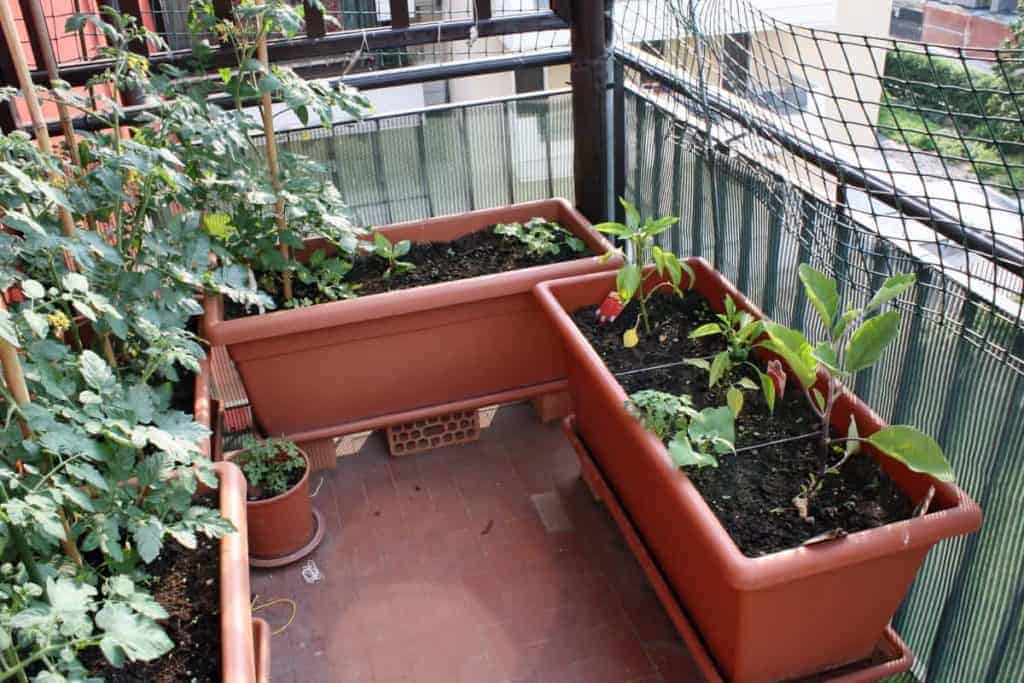
What kind of outdoor space do you have available to you? Do you have a balcony or small patio? Do you have a small backlot? Do you have planter boxes on your building or areas of landscaping? Do you have a roof you can plant on?
What kind of indoor space do you have? Do you have windows available? What about window ledges? Or bars on your windows?
How much sunlight can you count on? Are your planting spaces facing north, west, east, or south? How does the amount of sunlight shift with the seasons? Do you get stronger sun in the morning or afternoon? What kind of sunlight do your outdoor spaces receive?
What kind of weather do you get? Do you live in a northern city with harsh winters or a southern one? Are the summers unbearably hot without AC?
By answering each of these questions you should be able to decide the best types of crops for your survival garden and the best methods to plant them.
After you do an in-depth analysis of your environment, you should be able to know if you will be planting principally in containers, in small beds, or strategically undercover as urban landscaping.
If you have more space at your disposal, and you're not stuck in an urban environment, you can check out our comprehensive guide on how to start a survival garden in a suburban or rural home.
Creative Solutions for Planting in Small Spaces
The first thing you need to figure out is how and where you will be planting your survival garden crops.
The most common options that urban preppers and homesteaders have are:
Indoor survival gardens planted either hydroponically or in containers.
Vertical survival gardens utilizing planters or small raised beds, trellising, and hanging containers.
Hidden survival gardens planted ‘incognito’ as landscaping around buildings, parking areas, or small green spaces.
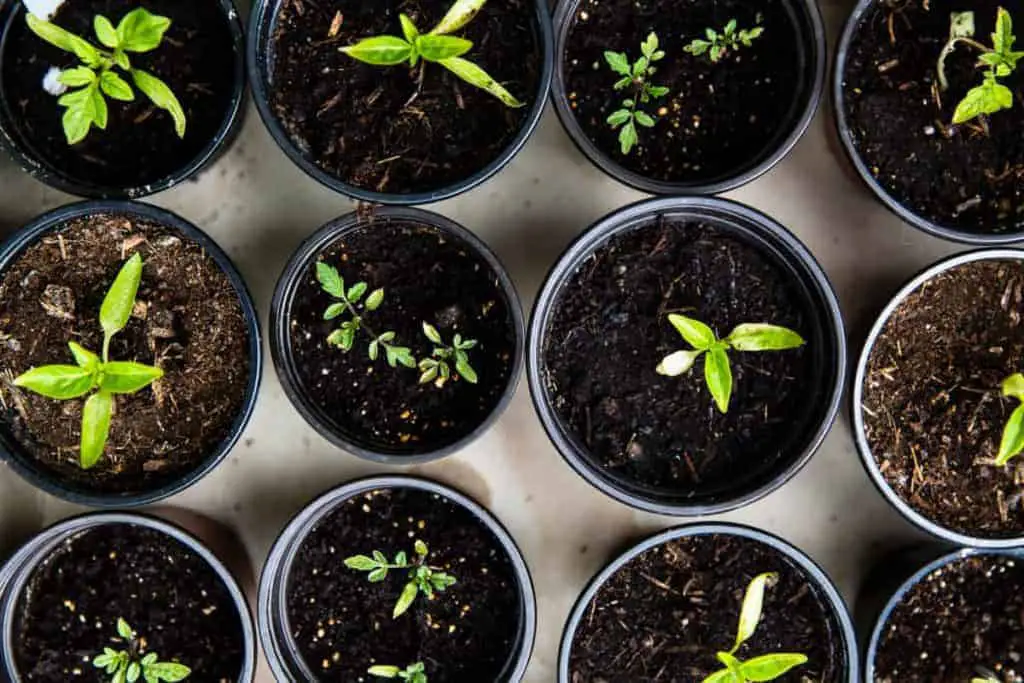
No matter where you will be planting, you are most likely going to need containers.
The Best Containers to Use for Your Survival Garden
Unless you want to do a hydroponic setup, which we’ll discuss later, you are going to need a lot of containers for planting an urban survival garden.
How do you know which are the best containers for your plantings? Here are some criteria to keep in mind:
1. The shape of the planter.
First off, it is recommended that you look specifically for planting containers that are square or rectangular in shape. This will allow you to line them up, one next to the other, creating a maximum amount of planting space.
2. What is the container made of?
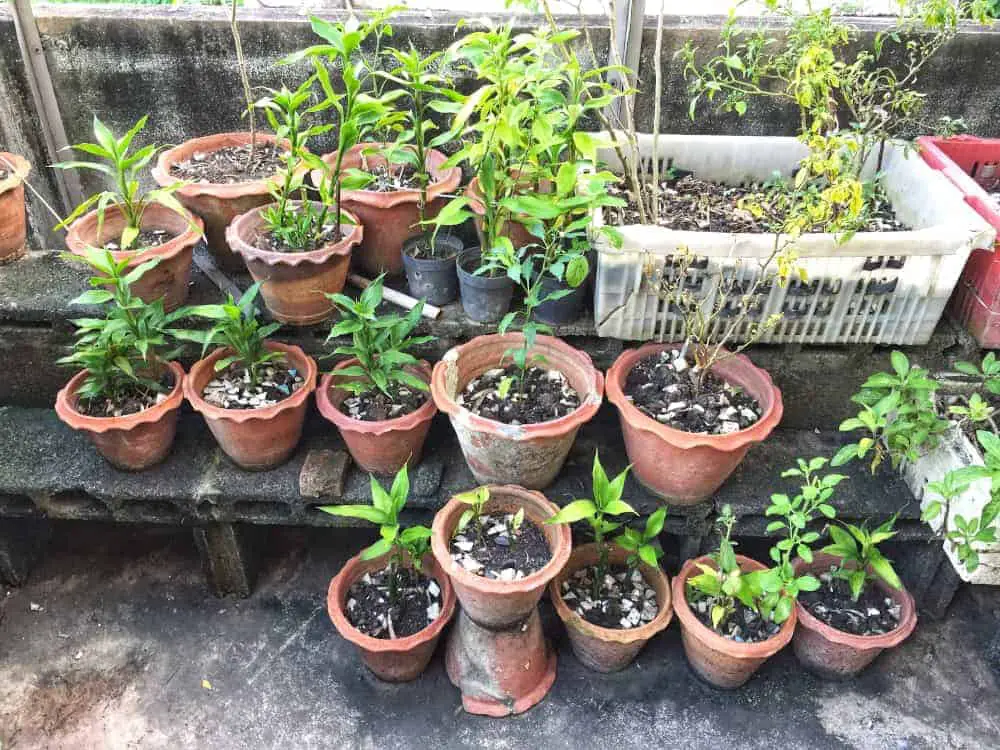
There are a lot of different materials that planters can be made of. Plastic, ceramic, terra cotta, wood, or metal are just a few options. Planters made out of recycled materials are also becoming common.
You will most likely choose your planter based on how they look.
But there are some distinct advantages or disadvantages to each kind of planter that you should consider.
Plastic containers:
Pros: inexpensive, lightweight, hybrid designs (like special planting bags, or large capacity potato planter bags)
Cons: Weakens and degrades with sun exposure and time. Concerns about plastic chemicals leaching into food crops. Look for planters labeled as #2 HDPE, #4 LDPE, and #5 PP. These are considered the safest planters for producing food.
Ceramic or Terra Cotta containers:
Pros: Bottom heavy, porous, retain heat
Cons: Breakable, cause more frequent waterings, can overheat in hot weather.
Wooden Planters:
Pros: Lightweight, durable, cold weather resistant, can be custom built.
Cons: May be cured with dangerous chemicals, susceptible to rot.
Metal Planters:
Pros: Will not chip, break or rust when properly lined and sheltered from the rain.
Cons: May contain lead, can rust when exposed to rain or not lined properly, heat and cool quickly.
Fabric or Cloth Planters:
Pros: Greater breathability for the roots of your plants, may be biodegradable, lightweight, versatile size and shape options
Cons: degrade quickly, can be impractical indoors
3. The depth of the planter.
Most vegetables will grow just fine in soil that is at least 6 inches deep. Find planters that offer at least this much space of vertical depth to assure greater success with your plantings.
4. Adequate drainage.
This might seem obvious, but you’d be shocked at how many commercially available planters are out there that do not offer enough drainage.
Plastic planters will usually have “punch out” holes that let you adjust the drainage on the container.
For ceramic or terra cotta planters, it can be a bit of a challenge to open up a larger hole… you can risk breaking the container.
Metal and wooden planters can usually be accommodated with a simple drill.
5. How heavy is the planter?
Sometimes you will want a heavy planter, and other times you will want a very lightweight planter. It depends on what you are going to plant and where.
If you will be planting something in a windy area, heavy is good. However, if you are planting on a small balcony, you might need to keep the weight of your planters to a minimum.
Choosing the best containers for your urban survival garden will require you to consider all of the factors mentioned above. There is no one standard “ideal”.
What you plant will depend on where you plant. And where you can plant will have a lot to do with what the ideal planting containers look like for you.
Ideal examples of practical survival garden containers:
Keter Easy Grow Planter Box
This large capacity planter box can be used indoors or outdoors.
It’s got enough room to grow some basic root vegetables such as beets or carrots. You can plant practically anything in it!
Last update on 2024-09-23 / Affiliate Links / Images from Amazon Product Advertising API
A Word About Using Recycled Containers
We keep mentioning that one of your goals for your urban survival garden should be to not rely on commercial products.
This includes planters. One day, if society falls apart, you may have just as hard a time finding planters and planting containers as you do commercial fertilizer and potting soil mix.
Please understand that reused and recycled containers make excellent options for your survival garden. The characteristics and pros and cons discussed above will all hold true for improvised and DIY planters.
The following items make excellent containers for your plants:
Stacked tires
5-gallon buckets
Homemade cloth bags or recycled cloth market bags
Broken pots and pans
Cracked buckets of all sizes
Old Tupperware or plastic food storage containers
Plastic food packaging (such as rice or bean bags) are great for starting seedlings for transplanting later.
After SHTF, even the lowliest plastic packaging will become invaluable for your urban survival garden.
Before using recycled containers, make sure they did not previously hold any materials that are toxic or contaminating. Wash and scrub the container to remove any residues. Carefully open up drainage holes in the base of the container.
You can choose to enjoy attractive commercial planters while it’s still an option. They are undeniably more practical. But never forget that someday, you may not be able to count on replacing them.
It’s always a good idea to have a backup plan for improvising planting containers.
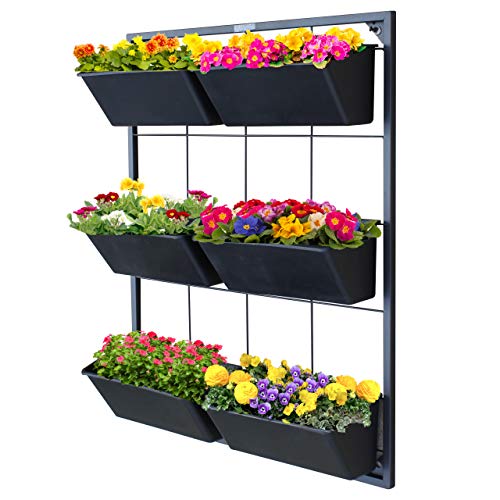
Other Ideas for Maximizing your Space Potential
Another way to maximize your potential growing space for your urban survival garden is to make some simple adaptations to your infrastructure.
Try “stacking” your plantings in the limited growing space you have. Take advantage of every bit of sunlight to grow as much food as possible.
Last update on 2024-09-23 / Affiliate Links / Images from Amazon Product Advertising API
You can maximize the potential of walls both indoors and out, by installing a sturdy steel frame that will hold the weight of various wall mounted planters.
Last update on 2024-09-23 / Affiliate Links / Images from Amazon Product Advertising API
Expanded Options for the Urban Survival Garden
Rooftop Gardening
If you are fortunate enough to have access to a rooftop, check into the possibilities of expanding your urban survival garden to it.
Before you get started, make sure the roof is able to handle the load of your survival garden.
Gardens are heavy!
If you are thinking of expanding your garden to a rooftop, keep the following in mind:
The roof should be mostly flat.
You need to have access to an outdoor water faucet for easy watering.
Be aware of how much wind your rooftop receives. Plan accordingly with bottom heavy planters and wind resistant plants.
Check to see if you have an area for tool storage.
Once you have the OK to start your rooftop survival garden, get to it! With so much space, you will be able to put in raised beds or larger containers for more extensive planting.
Undercover Edible Landscaping
If you live in an area that boasts even a minimal amount of land for landscaping, congratulations!
Permanent planter boxes, mini gardens beside an entrance, or even that green space between the sidewalk and the road can all be planted out with edible food.
Because this food is, by nature, in full view and accessible to the public, you will want to disguise it.
You can disguise your survival garden by using strategically chosen varieties of plants that most people will never recognize as food.
Consider using perennial varieties that are rated for the zone where you live. You can also mix in interesting annual crops that will escape the notice of most folks.
Depending on the space you have available to you, you may even want to consider planting fruit or nut trees!
Raised Garden Beds
Having access to a small lot, or rooftop garden, you might want to consider building some simple raised or elevated garden beds.
Elevated garden beds are basically extra large, flat, and wide planters with legs. They are elevated, making it easy to access and to maintain your crops.
Raised garden beds are installed at ground level. They can be installed on top of cement with no problems.
These are typically custom built for the space you have available to you. Plan carefully the length, width, and height (depth) of your garden beds because they are essentially permanent installations.
Make sure to take necessary measures to assure for adequate drainage.
Hydroponic Plantings
If you do a quick search on urban farming or vertical farming, you will see lots of images for the modern hydroponic farm.
Growing your food without soil is possible.
Basically, you "plant" your crops in either a PVC tube or some kind of plastic container that contains a nutrient rich, water based solution. The roots of your plants will grow into and feed off of this nutrient solution.
There are a lot of DIY plans available for free on the internet. It's actually very easy to get started with a basic hydroponic setup.
With just a minimal investment, you can install a basic hydroponic grow station in even the smallest of spaces.
It is really easy to create a well balanced nutrient solution using worm castings, fish, and blood meal, together with a few other key ingredients.
The advantage of growing hydroponically is that you eliminate the need for heavy soil and cumbersome planters.
The disadvantage is that you become reliant on nutrient mixes to fertilize the water your plants are growing in.
The thing is, and that we have to continually think about as prepper farmers, is how to maintain your hydroponic survival garden after SHTF?
Unless you have access to fish scraps, blood from the butcher shop, and different mineral salts - you might find it a challenge to maintain a hydroponic set up after society collapses.
Community Gardens
One of the best solutions for having very limited space is to band together with other urban gardeners to work a community garden.
Usually, community gardens will assign you a specific plot that is yours to plant with whatever you want.
These are a great solution for finding the space to produce bulk crops such as corn, squash, or beans. These crops are traditionally more difficult to grow in containers in the quantity that you will need to survive.
Community garden spaces typically provide a space for composting. As we will discuss later on, compost is just as important for your urban survival garden as the seeds you will be planting.
You should absolutely consider joining your community garden group if only to have a space to access abundant high quality compost.
The other advantage of community gardens is that you will create a network of acquaintances with whom you can share seeds, trade excess crops, and exchange invaluable knowledge and experience.
The disadvantage of a community garden is that they are fairly public spaces. If SHTF, the crops located in community gardens may become a target for less prepared and hungry neighbors.
While times are good, take advantage of the extra space that community gardens provide. Build your urban farming skills and increase your harvests while you can.
When you analyzed your space, how much light you have available to you, and the general weather conditions - you took the first step towards success.
With this information, you will be able to select plants and varieties that will thrive under the conditions that you have to offer.
If you have mostly shade, consider planting leafy green crops such as spinach, lettuces, or chard. If you have space, but not the sun, you can even give broccoli or cabbage a try.
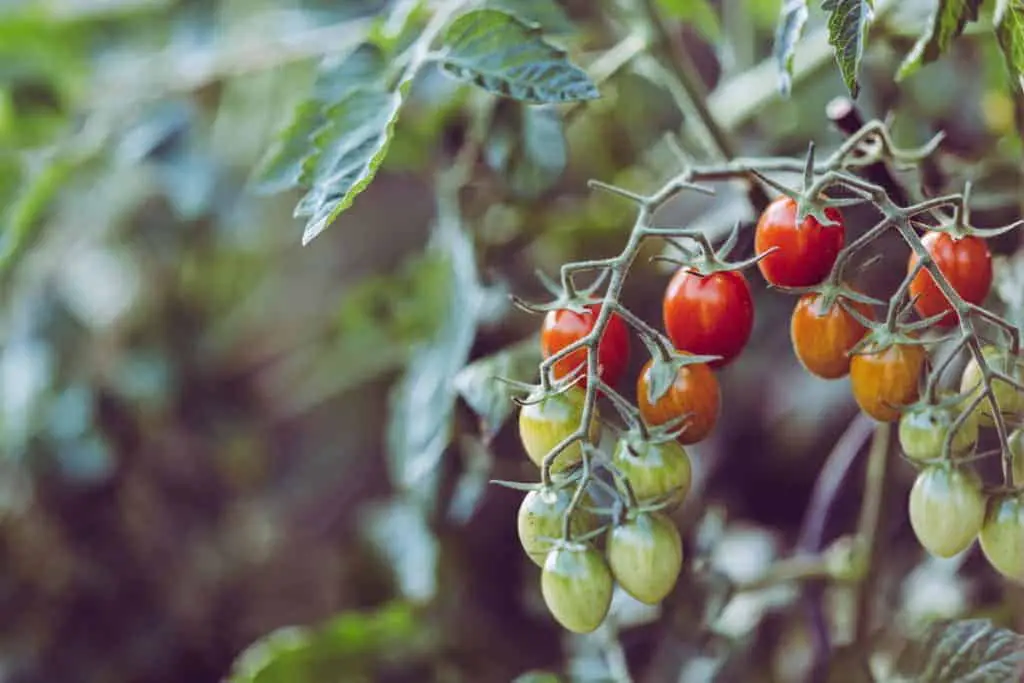
If you have intense sun. consider growing bell peppers, hot peppers, cucumbers, bush or pole beans, okra, tomatoes, or tomatillos.
If you have partial shade/sun, consider planting beets, carrots, leeks, green onions, peas, or potatoes if you have space.
All of these crops can be grown indoors with the appropriate amount of light, though the hot weather crops typically do better outside.
One ‘advantage’ that cities offer is the “urban heat island” effect. If you are in a city, the temperatures will typically be slightly higher than the rural areas outside the city.
While this can be really uncomfortable in the heat of summer, it offers the urban prepper farmer a slight advantage for his survival garden.
You can grow hot weather crops more successfully and can grow cool-weather crops starting earlier in the spring and throughout the fall (and winter in southern cities).
If you plan your crops carefully, your urban survival garden can produce food year-round.
Aside from making sure your plants receive the amount of sunlight and heat they need, you have to make sure that they are being fed from below.
You need to take care that your plants have the right potting soil, nutrients, and minerals needed for them to grow successfully
Potting Soil and Fertilizer for Your Urban Survival Garden
When a plant is in a regular garden bed, they can send out roots in all directions to hunt down the fertility and nutrients that they need to grow and produce.
When a plant is in a container, however, it simply doesn’t have that option.
Your plants are counting on you to keep them fertilized.
Even if you start out with an incredible potting soil mix, your growing plants will consume all its fertility and minerals after about six weeks.
By then, your plants will need fertilizing to continue growing to their maximum potential and produce abundant harvests.
So, what is a survivalist urban farmer to do?
The easy solution is to run to a hardware store and pick up a few bags of nice potting soil and some concentrated fertilizer.
This may very well be what you need to do to get started with your urban planting. There’s nothing wrong with this, and it will certainly help you get your survival garden growing in a hurry.
It’s ok to take the easy road while you prepare yourself to go down the hard one.
As an urban prepper, you need to be thinking about what happens after SHTF and there is no hardware store to run to.
You need to learn how to make your own fertilizerand high quality potting soil for your urban survival garden.
Check out this video guide on how to make your own plant fertilizer for the urban survival garden.
Most gardening websites that offer DIY recipes for potting soil will have you running to the store to purchase peat moss, perlite, vermiculite, or coconut fiber.
While you can certainly do that, it’s not recommended for the urban survivalist farmer.
First off, all of those materials, while highly effective, are imported and mined. Remember, we’re preparing for a post-SHTF world.
Most of those things will be long gone from the market when you most need them for your urban survival garden.
Potting soil should hold moisture but drain quickly. It should be light and fluffy, and should never compact.
So where do you get the compost? Where do you get the soil?
Finding Soil in the City
Unfortunately, finding soil in the city can be a bit of a challenge. And sometimes, when you manage to find some, it can be contaminated from urban and industrial residues.
If you live in a very densely populated area and have no access to soil, to get started with your DIY potting mix, it is recommended that you purchase a sack or two of high quality topsoil.
If you have access to a small yard or plot of land, you may be able to take some topsoil off the surface. Consider getting a soil test done to make sure that what you want to use is not contaminated.
Another option might be natural areas or public lands that are located just out of the city. If you have access to small tracts of forests or fields, you can easily scrape up a few sacks of topsoil.
Just make sure to avoid soil that is right along the roadside.
Once you have your soil you can continually renew it with the regular addition of compost.
Last update on 2024-09-23 / Affiliate Links / Images from Amazon Product Advertising API
Finding Compost in the City
Compost, as precious as it is, is actually not that difficult to find and it is even easier to produce yourself.
Here are some options for obtaining abundant amounts of compost for cheap or free.
Municipal Waste:
Fortunately, decent quality compost is available in most urban areas through the municipal waste collection entity.
Many cities collect organic waste (tree trimmings, leaf sweepings, etc.) and compost it in industrial compost piles.
This finished compost is then made available to consumers at a very economical price. Sometimes, it is even available for free.
You might need to do some research to find how to get some of your cities compost, but it is absolutely worth doing while the option is available to you.
Even after SHTF, those industrial-sized compost piles will still be there. They may be a bit more difficult to access, but it will essentially be there for the taking.
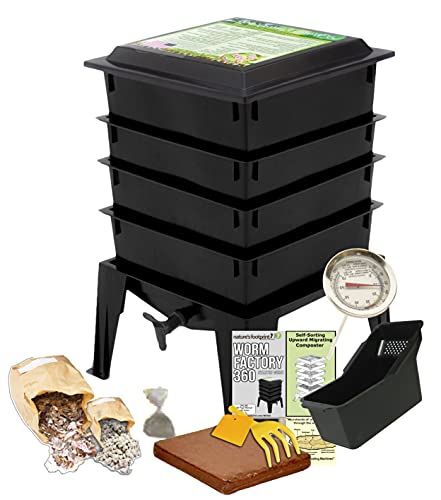
Honestly, every urban survival garden farmer should have a worm bin. These take up a relatively small amount of space and produce incredibly rich compost and liquid fertilizer.
With the right sized worm composter in your organic survival garden, you can produce nearly all of the compost and fertilizer you will need to grow your crops.
You basically feed the worms organic matter. This includes certain kinds of food scraps from your kitchen or garden trimmings.
The worms will munch all this up and churn it around. The moisture that drains out of the bin you can collect and use as liquid fertilizer. The chomped up and processed organic matter is called worm castings.
Once the worms are done with it, this can be stored until the time comes to replant and dress your soil. Worm castings are the best compost available!
DIY worm composting bins are very easy and inexpensive to make. You can even use recycled or improvised containers.
There are some really great, compact, “worm farm” kits available as well if that is your style.
Last update on 2024-09-23 / Affiliate Links / Images from Amazon Product Advertising API
Composting Bins:
If working with worms is not your thing, composting without worms is another great option to generate compost for your urban survival garden.
Composting can be done indoors or outdoors.
Find the place where you want to put your composting bin, and then you will know what size composter you need to find.
You will need to layer soil, food scraps, and organic matter such as paper or leaf litter. Every few weeks, you'll need to stir the mix. This will speed up the composting process.
You should have at least two containers. When one is full, you can let it finish its composting process while you fill up the other.
When the compost is finished, store it until you are ready to add it to your potted plants or refresh your potting soil.
Pest Control for your Urban Survival Garden
As an aspiring urban prepper farmer, you might assume that problems such as bugs and pests won’t be an issue for your potted plants.
It’s not like you are planting out a huge extension of delicious food that will attract all different kinds of aphids, caterpillars, or flies.
But, actually… you are. It’s maddening how those little buggers show up out of nowhere, ready to ruin everything.
You have to be prepared to handle them
First off, prevent serious pest problems by making sure your plants and the soil they are in are healthy! If your plants are healthy they will be able to defend themselves better against any attack.
Second - don’t be lazy and rely on harsh chemical pesticides. Never forget that after SHTF they probably won’t be available.
The simple solution to any problems you may have with pests in your survival garden is a basic insecticidal soap.
Mix one tablespoon of a simple liquid soap to one cup of vegetable oil. Store that in a jar.
When you see bugs on your plants (or fungi, for that matter) take 2 tablespoons of that mixture and blend it into a quart of water. Spray directly on your plants, taking special aim at those pesky bugs.
If you want to amp up the power on your homemade insecticide, consider adding finely ground hot pepper powder or finely mashed garlic to the mix.
There are quite a few DIY insecticide recipes available that are highly effective at controlling pests.
The Best Urban Survival Garden Crops
The best crops for your garden depend exclusively on the environment and space that you have available.
Every urban survival garden will be different.
Some prepper farmers in the city will have access to small lots. Others may have only a small balcony. Still, others may be limited to what they can fit in their window sills.
We all know that the goal of a survival garden is to grow enough food to keep you and your family alive. Unfortunately, this is next to impossible in an urban setting.
What you can do, however, is focus on finding the most productive crops for the space you have available.
Here are some suggestions:
Best Plants For the Indoor Micro Survival Garden:
Parsley
Cilantro
Basil
Oregano
Green onions
Chives
Hot peppers
Lettuces or Micro Greens
Spinach
Chard
Best Plants For the Expanded Indoor Potted Garden:
All of the above, plus
Carrots
Radishes
Beets
Strawberries
Small tomato varieties
Bell Peppers
Aloe Vera
Best Plants for an Outdoor Patio or Balcony:
All of the above, plus:
Peas
Green Beans (bush or pole)
Cucumbers
Larger tomato varieties
Potatoes
Broccoli or Cauliflower
Cabbage
Kale
Eggplants
Okra
Best Plants For Small Lots, Raised Beds, or Rooftop Gardens:
All of the above, plus
Squash or Pumpkins
Corn (companion planted with beans)
Potted Fruit Trees
Onions
Summer Squash
Best Plants For Undercover Landscaping Survival Gardens:
Artichokes
Fennel
Jerusalem Artichokes
Asparagus
American Groundnut
Elderberries
Rhubarb
Ornamental Kales
Amaranth
Dandelion
Aloe Vera
Crops for the Community Garden:
Corn
Squash or Pumpkins
Dry Beans
Potatoes
Sweet Potatoes
Jerusalem Artichokes
For more ideas on survival foods other than vegetables, have a look over our guide for the best prepper survival foods.
The Best Survival Garden Seeds
As an urban survival gardener, you are going to want to pay special attention to the seeds you purchase.
First, you will need to research the varieties available for each type of vegetable. There are certain varieties that thrive in planters or small spaces.
You would hate to purchase a giant indeterminate variety of tomato for your patio garden when smaller, compact, high producing varieties exist.
Second, make sure that all of the seeds you purchase are certified non-GMO, organic, and open pollinated. If the seed packet says OP, you're good to go.
This second detail is important because if you find a variety that does really well in the space you have to offer it, you will want to let it go to seed.
Saving the seeds from your survival garden crops is an important part of making sure that you can continue to plant well into the future when commercial seed distributors no longer exist.
Investigate the best way to save seeds from each crop you are planting.
Preserve your seeds in a cool, dry location after dusting them with ash or activated charcoal.
Save enough seed for multiple plantings. When you have particularly beautiful and healthy plants, harvest fresh seed from them. Use your older seed to trade with other urban survival gardeners.
Once you harvest your survival crops you'll need a way to store them. For ideas on survival food storage containers, have a look over our dedicated article.
Urban Survival Garden Frequently Asked Questions
Does compost stink?
Compost should not stink. That being said, when you are composting, either with worms or without, you may discover that things get a little smelly.
That just means you are not doing it right.
Be sure that when you add fresh kitchen waste into your composting bin, you dig it into the compost that is already in process.
Then, be sure to cover everything up with a fresh layer of dry organic matter. Finely shredded newspaper, cardboard, or even dry leaves should work just fine.
You will also want to make sure that what you are adding as fresh waste is appropriate for your compost bin. If you have worms, you may find that there are some things those guys just don’t like.
Can I grow medicinal plants in my urban survival garden?
YES!
You’ll notice that aloe vera was included in our lists of the best crops to grow for your indoor survival garden. This is a very common houseplant that is also spectacularly useful as a medicinal plant.
Other medicinal herbs that you can grow include lemon balm, chamomile, turmeric, ginger, and lavender amongst others.
Each of these medicinal plants can easily be grown indoors and in pots. In your urban survival garden, all of your potted plants should serve a purpose!
Once you have your survival garden crops harvested, be sure to check out our guide on the best methods for survival food preservation. These will ensure your prepping is not in vain and you'll have plenty of food if SHTF.
Good Luck and Happy Urban Gardening!
With all the information you’ve just read, you shouldn’t have any problem getting started with your urban survival garden.
As you gain experience and develop your ‘green thumb’, you will continue to investigate and learn all of the fine details that go into producing a successful harvest.
Knowing how to maintain an urban survival garden is a satisfying hobby in good times and an invaluable survival skill when times are hard.
We´ve created this comprehensive guide to help you understand all about freeze dried survival food. In this article we answer 16 questions preppers may have around freeze drying.
In this article we´re going to lay to rest any doubts or confusions preppers may have about freezing food. We´ll also let you know which are the best survival foods for freezing and how long you should keep them stockpiled.
In this article, we´re going to dig deep into the advantages of having a prepper freezer. We will also give you our recommendations for the best ones to store your food for long term survival.
We argue that storing meat without refrigeration is one of the most important skills every prepper needs to learn. In this article we talk about several methods to store meat long term even if you don't have a freezer.