In this informative guide on traditional survival food preservation methods, we’ll get you started on your journey towards prepping your food if or when SHTF.
Telson Survival is a participant in the Amazon Services LLC Associates Program, an affiliate advertising program designed to provide a means for sites to earn advertising fees by advertising and linking to Amazon.com.
Telson Survival is supported by its readers. Please assume all links are affiliate links. If you purchase something from one of our links we make a small commission, at no extra cost to you. This helps us pay for the running of this website. Thank you for your support!
One of the most important preps that you can make is learning how to grow, forage, or hunt your food.
And the most important part of learning about producing and procuring your food is learning about survival food preservation.
In other words, how do you store your food so it doesn’t go bad on you?
In this informative guide on traditional food preservation methods, we’ll get you started on your journey towards understanding how to best put food away for the future.
As you can imagine, it is a broad subject. It’s kind of like going back in time and doing a quick study of what our grandparents knew by birthright, and what human beings have been doing to survive since time immemorial.
One thing to keep in mind is that you should preserve only the freshest of foods. Carefully look over everything and inspect your food for any signs of rot, mold, fungus, bugs, or rancidity.
Here’s a simple overview of each traditional food preservation method.
In a hurry? If you just want to get to our conclusions, here are our top picks and recommendations!
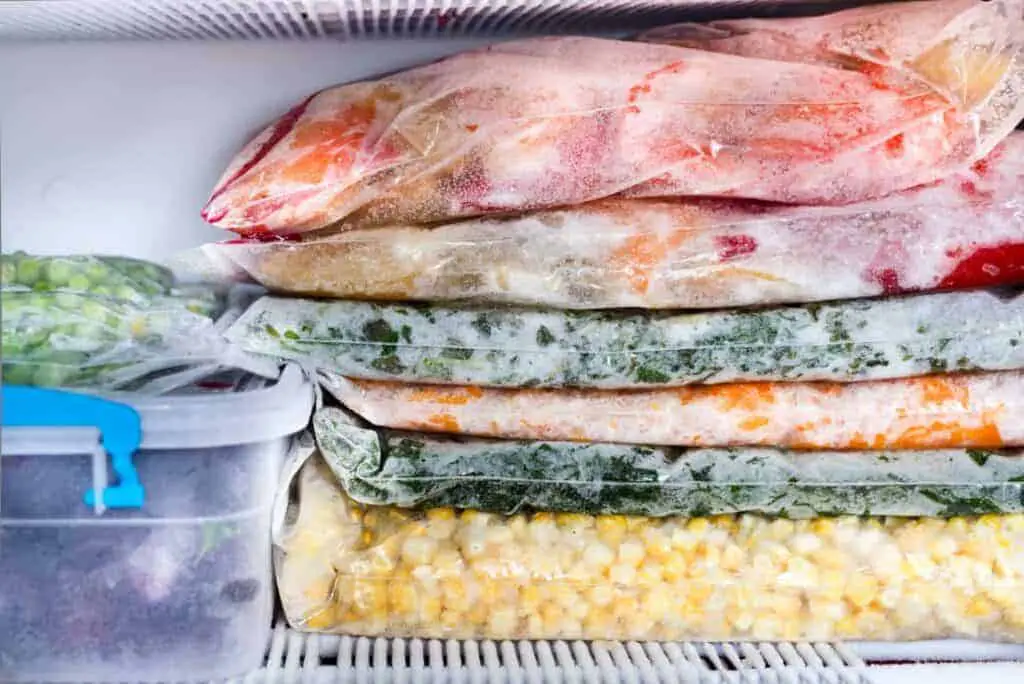
Freezing is a practical method for preserving your food. It’s quick, easy, and pretty hard to mess up.
The Pros of Freezing Food:
Preserves the food's nutritional value and fresh flavor.
No special equipment is needed besides the freezer.
Quickly prevents food spoilage.
Freezing can buy you time for further processing at a later date.
The Cons of Freezing Food:
Can produce changes in the food's texture.
If the freezer thaws, you will need to consume the thawed food immediately or risk it going bad.
Frozen food diminishes in quality after a few months (depending on the type of food and the packaging it’s in).
How to Freeze Your Survival Food
Make sure you have appropriate containers for freezing. We recommend a vacuum sealer system. If this is out of your price range, you can also purchase designated freezer bags.
Freezing Fruit: Slice large fruit - this is unnecessary for berries and small fruits - and spread out trays. Freeze them for an hour or two. When the fruit is mostly frozen, take it off the trays and repackage into freezer bags.
Freezing Veggies: Be sure to clean, peel, and chop everything into usable sizes. Blanch the prepared vegetables for two to three minutes in boiling water then immediately submerge everything in ice water. Strain and pat dry. Spread the blanched veggies on freezer trays, freeze for an hour or two, then repackage into freezer bags.
Freezing Meat: Divide your meat into individual portions. Wrap each cut of meat in plastic wrap or freezer paper. Then place each cut into a freezer bag or double wrap with foil.
Freezing Herbs and Spices: Chop each herb finely or run it through a food processor. Fill each compartment of an ice cube tray with chopped herb and then top off with water or olive oil. When they are frozen, pop the cubes from the trays and repackage into freezer bags.
Remove Air: When you transfer your foods to their permanent freezer bag, you need to press out as much air as possible. This is why we recommend using a vacuum sealer for freezing. Removing air prevents freezer burn, off tastes, and the growth of bacteria while thawing.
Last update on 2024-11-08 / Affiliate Links / Images from Amazon Product Advertising API
If you do not have a vacuum sealer, use a straw in the corner of a mostly closed freezer bag. Suck out any remaining air before stealthily slipping the straw out and closing the bag.
Some Things to Keep in Mind About Freezing Food
Water-heavy vegetables like cucumbers, tomatoes, and mushrooms generally do not freeze well.
As long as you maintain the freezer at 0 degrees, food can be kept indefinitely.
Freezing is a convenient way to store ready-to-eat prepared meals, pre-mixed dough, cheese, milk, and butter. In short, you can freeze practically anything.
Freezing can prolong the shelf life of nuts, grains, and milled flours.
Freezing food outdoors by taking advantage of winter temps can be a quick solution in a pinch. Just remember that fluctuating temperatures can allow your meat (or other foods) to thaw. This can potentially allow for the growth of unhealthy bacteria.
Stay Prepared For Any Emergency!
If you like this article, consider subscribing to our free newsletter. We only send a few emails each month, with quality content related to Prepping and Survival, and absolutely no spam.
Thank you!
You have successfully joined our subscriber list.
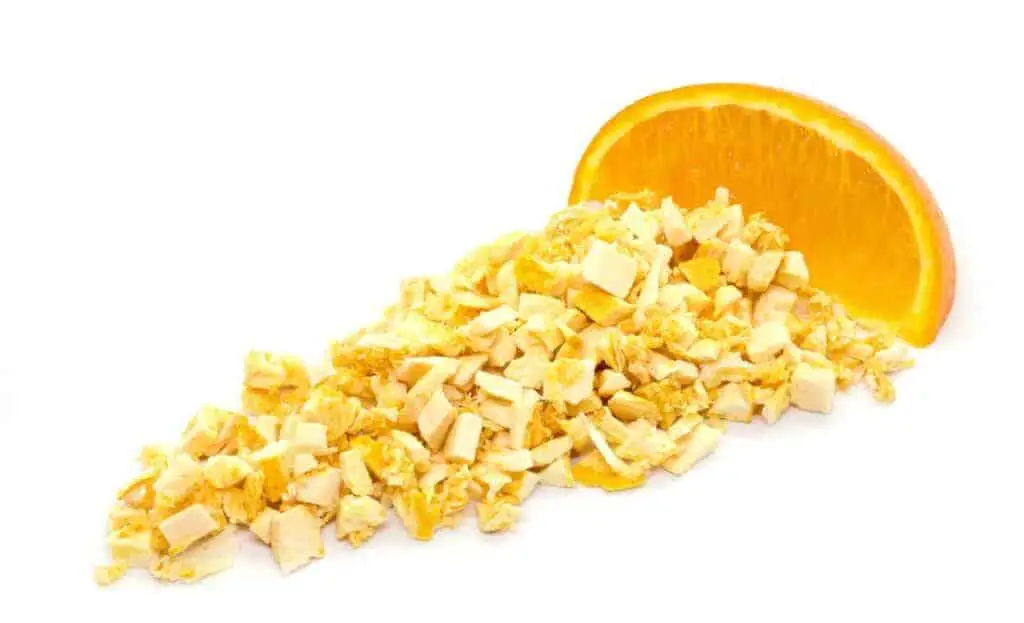
#2. Freeze Drying Survival Food
Freeze drying is a traditional food preservation method that has been around for thousands of years. Societies located high in the mountains with below-freezing temperatures year-round could freeze dry and store their crops successfully for years.
The concept is simple. Freeze the food and then wait for any moisture to evaporate out of it.
This can be done without a fancy freeze drying machine. How?
Simply place a tray of very finely sliced food into your freezer. It will freeze pretty quickly. Then leave it there and wait. Depending on how cold your freezer is, how frequently you open it, and how much moisture was in the food - freeze drying takes place naturally over the course a week or two.
Honestly, this method of freeze drying is not very efficient, especially if you have a small freezer and a lot of food to put up.
We personally do not recommend this method if you are serious about survival food preservation and plan on putting up large quantities of food.
Fortunately, there is an alternative.
Home Freeze Drying Machines
First off, home freeze drying machines are expensive. Certain models cost more than $7000.
Harvest Right, however, has come up with a fairly accessible countertop freeze dryer that has quickly become the gold standard for freeze drying food preservation.
If you are serious about survival food preservation, this is as good as it gets as long as you can count on a steady supply of electricity.
The Pros of Freeze Drying Food:
Freeze dried food, when properly stored, will last for up to 25years.
You can freeze dry practically anything, including pre-cooked meals.
Preserves food’s color, vitamin content, and original texture upon rehydrating.
The Cons of Freeze Drying Food:
It’s expensive.
How to Freeze Dry Survival Food:
Fresh meat, veggies, fruit, etc.: Simply wash, pat dry, and lay out the food on the trays. It’s recommended to cut fruits and veggies into ready-to-use sizes.
Precooked Meals: Spread out the meals evenly on the trays, taking care to keep everything under ½ in. thick. For taller foods space them out on the tray to allow for air circulation.
Dairy and Liquids: Milk, yogurt, and even liquid coffee can simply be poured onto the trays.
Press start. Home freeze drying machines are automatic and easy to use.
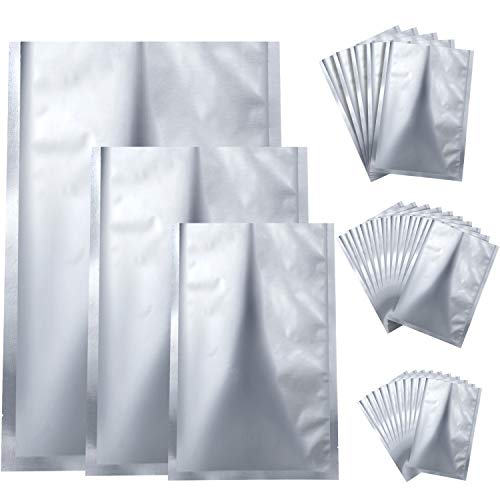
Package: When the freeze drying is complete, pack your preserved survival foods in individual portions. Use sealed mylar bags or vacuum sealed mason jars. Label, date and store your survival food in a cool, dark location.
Last update on 2024-11-09 / Affiliate Links / Images from Amazon Product Advertising API
Some Things to Keep in Mind About Freeze Drying
Freeze drying will work for nuts, but not nut butter. You should also avoid sugary viscous foods, like honey or jams.
You cannot freeze dry butter or oils.
Freeze drying will work only if you have a consistent electricity supply. Use it while you can to build up a hefty survival food cache. You won’t regret it.
Just know that if the grid goes down in a zombie apocalypse, you probably won’t be able to use this fancy survival food preservation tool.
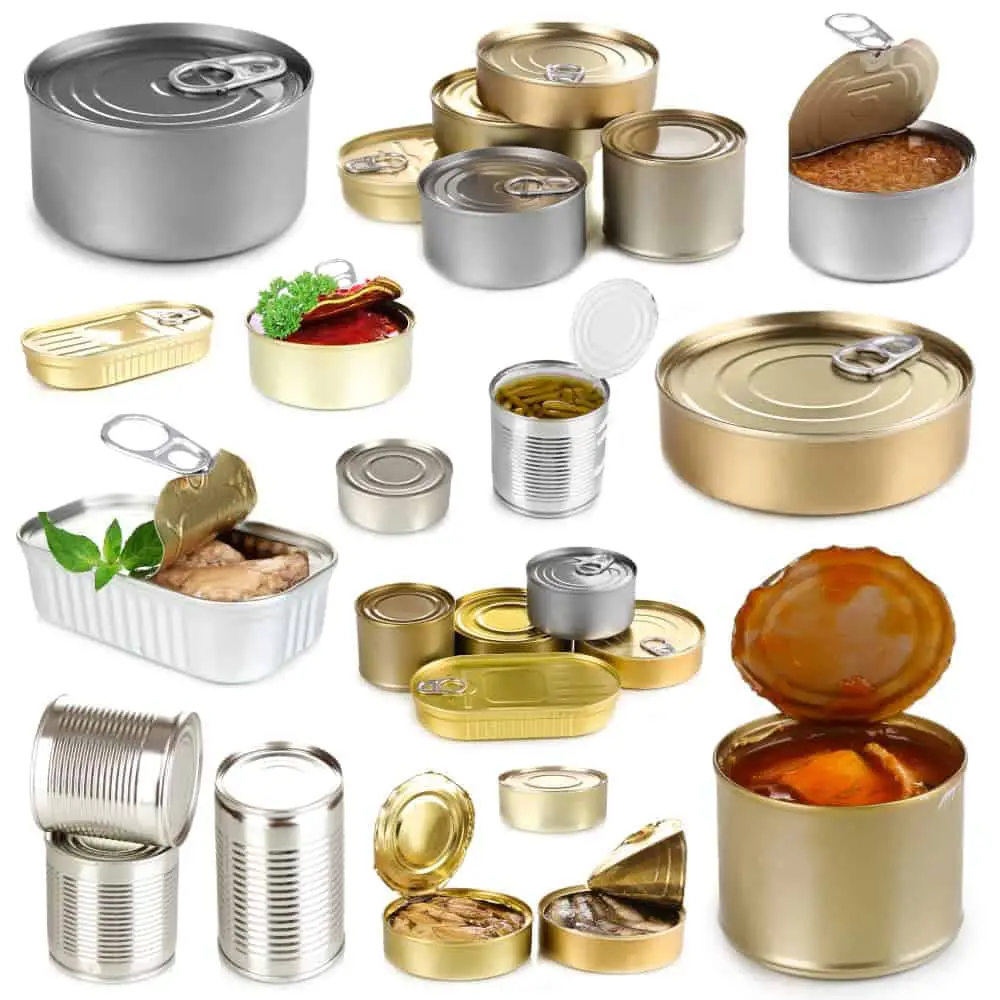
#3. Canning Survival Food
To be honest, canning will probably cease to be a practical survival food preservation method if society as we know it collapses.
But having said that, you should add canning lids and jars to your list of survival garden supplies if you cannot imagine life without canning. It is, after all, an incredibly practical off-grid traditional method to preserve food.
You may even want to purchase a couple of blocks of canning wax and study up on the old-time methods of sealing canning jars with paraffin. We won’t go into that here.
With a hefty stockpile, and taking extreme care of your supplies, you should be able to continue canning years after new canning supplies can no longer be purchased.
Food Canning Methods at a Glance
Modern canning is easy but requires careful attention to detail.
First off, you have to know what kind of canning system you will be using. Each one has a particular method.
Pressure Canning:
This is the method that completely kills not only botulism bacteria but also botulism spores.
It is considered the only acceptable method to can low acid foods. This includes meat and pretty much any vegetable that isn’t a tomato or that you don’t want to pickle.
Pressure canning requires a pressure canner. This can be a big investment but is worth it if you want to put up a lot of meat and non-pickled foods.
Last update on 2024-11-09 / Affiliate Links / Images from Amazon Product Advertising API
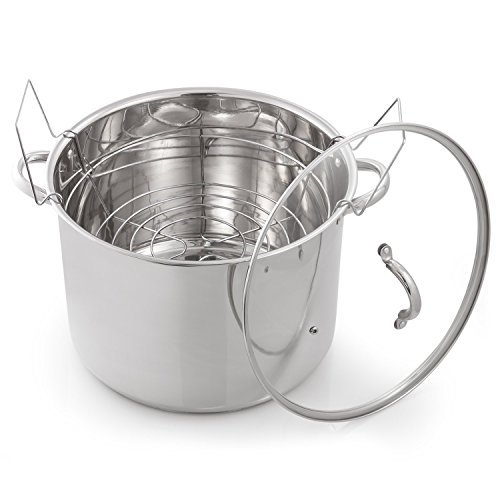
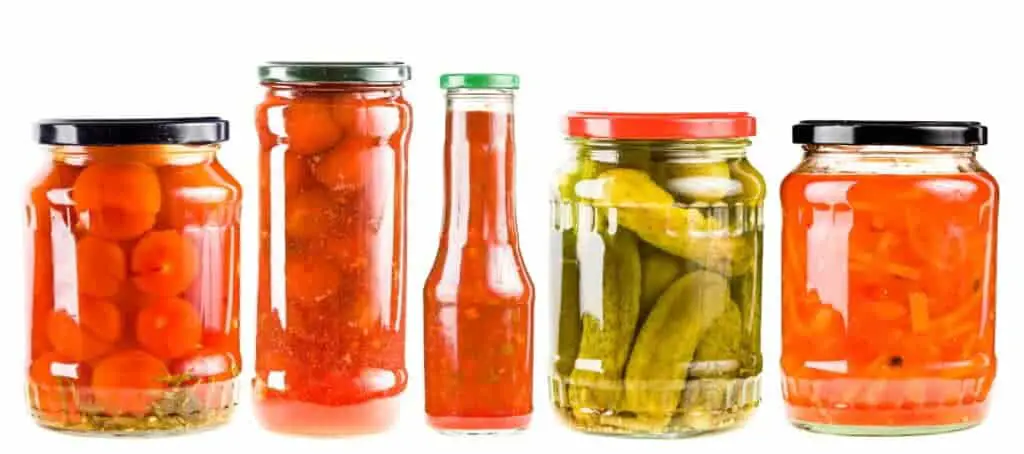
Boiling Water Canning:
This is probably the most common method of canning. It requires nothing more than a large canning pot that can hold your mason jars and the water to cover them.
This method of canning is great for high acid foods (anything pickled) as well as jams and tomatoes
Last update on 2024-11-09 / Affiliate Links / Images from Amazon Product Advertising API
Steam Canning:
Steam canning is a relatively new player on the canning “scene” but is gaining popularity because it is faster than the boiling water bath method. It uses much less water.
You do need to invest in a simple steam canner, but other than that you need no special equipment. Steam canning works the same way as a boiling water bath - heating the food inside the jars to the temperature of boiling. This kills all the bacteria that may be present in the food. As the jars cool off, they will seal.
Last update on 2024-11-08 / Affiliate Links / Images from Amazon Product Advertising API
Canning for Survival Food Preservation
Using both pressure canning and boiling water or steam bath methods of canning, you can put up an incredible amount of food.
Canning is versatile but it still has its pros and cons.
Here’s a brief prepper’s canning guide to get you started.
The Pros of Canning Food:
You can store ready-to-eat foods that require no reheating, rehydrating, or further preparation
Canning prolongs the shelf life of most foods to at least a year or two, if not more,
You can preserve bone broths and liquid milk.
Allows you to preserve meat, poultry, and fish without dehydrating or oversalting.
The Cons of Canning Food:
Is very time consuming.
Requires new lids nearly every time.
Exists a risk of contamination if not done properly.
Slightly reduces the nutritional value of the food.
The First Steps to Canning Food
No matter what method of canning you want to utilize, you need to first prepare your equipment.
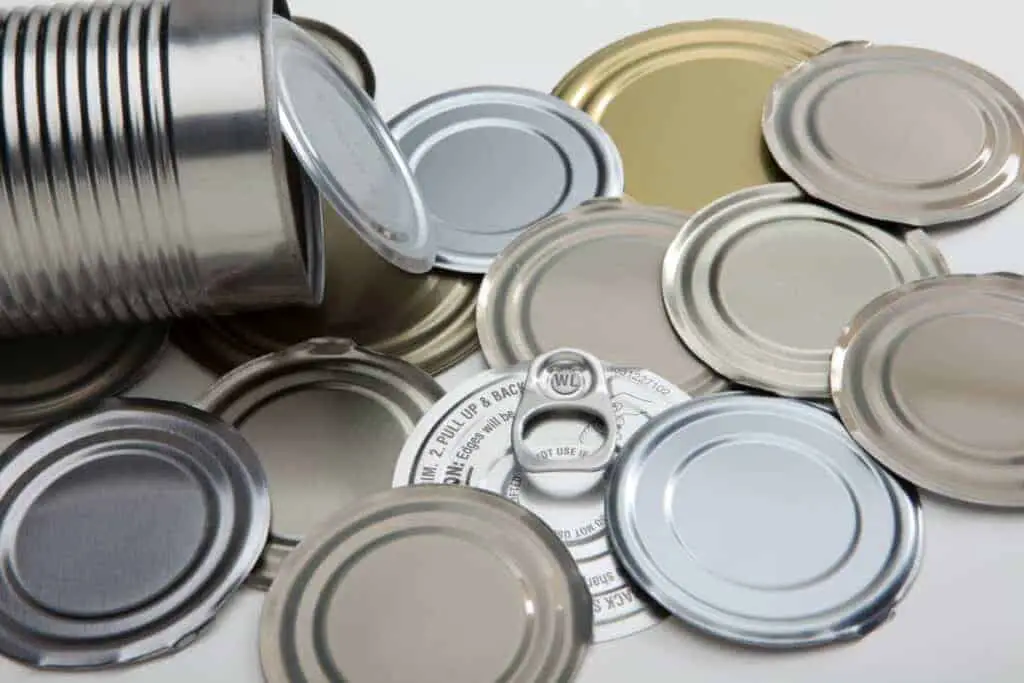
All canning jars, lids, and rings should be inspected.
Jars should be free of cracks, chips, or any flaw.
Lids should be new (or like new if you are recycling them) with no rust or wear on the seal.
Rings should not be dented.
Sterilize your cans, lids, and rings in a boiling water bath after thoroughly washing with soap and water.
Universal Tips and Rules to Live By When Canning Survival Food
To save a bit of time, start heating the water in your canner while you are preparing and filling your jars.
It’s recommended to always pack hot food into hot jars before being placed into a preheated canner. This is called “hot pack canning”.
Or for “cold pack canning”, you place raw (room temperature) food into hot jars that you will then fill with hot liquid before sealing and placing into a reheated canner.
Always leave about an inch of space between what you’re canning and the rim of the jar, unless your recipe says otherwise.
After filling your canning jar, wipe the rim with a clean cloth to remove any food debris to ensure a good seal.
Follow the manufacturer's instructions for your pressure canner or steam canner.
Follow your recipe’s instructions on whether to release pressure naturally or not for pressure canning.
After removing your jars full of preserved goodness from the canner, you need to let them cool and set for about a day. After this, carefully inspect each jar for a proper seal before storing them away.
Canned food should be stored in a cool, dark place.
What Food to Can and How
Canning Meat, Poultry, or Fish:
Start by cleaning the flesh of any extra fat and cut into ½ in. to 1 in. cubes. You may precook the meat if you prefer.
Pack the meat into the canning jar, then fill with boiling water. If you want to add salt (which is optional) add 1 tsp. For a quart jar and ½ tsp.
YOU MUST CAN MEAT IN A PRESSURE CANNER.
Let the heat build up in your pressure canner for about ten minutes before placing the weighted gauge.
Once the gauge reads 10 lbs. (or 15 if you live above 1000 ft above sea level) start your timer.
Meat and meat products should be processed in the pressure canner for at least 90 minutes.
Canning Broth, Milk, or Soups:
Prepare what you wish to preserve and have it hot. It should be at the point of boiling when you pour the liquid into sterilized and still hot jars.
YOU MUST CAN BROTH, MILK, AND LOW-ACID SOUPS IN A PRESSURE CANNER.
Place the jars into your pressure canner. When the pressure gauge reaches 10 or 15 lbs., start the timer for between 10 - 25 minutes, depending on the size of your jars and your altitude.
Check out this video guide below on how to pressure can chicken soup at home!
Canning Veggies:
If you want to can carrots, squash, beets, potatoes, etc. without pickling them first, you MUST use a pressure canner. However, if you want to pickle them, or use them as ingredients in relishes, then you can use a boiling water bath or steam canner. Remember, it all has to do with acidity.
It’s worth noting that pressure canned vegetables will lose their firmness and most of their texture. Their flavor, however, will be enhanced. This makes them excellent for use in soups, purees, and other hearty dishes.
Chop all veggies to the desired size and decide if you will be cold packing or hot packing your jars.
Follow a specific recipe or the USDA’s complete guide to home canning for instructions on how to can each specific vegetable.
Fruits, Jams, Jellies, Sauces, etc.:
There are just as many ways to preserve your fruits as there are varieties of fruits worth preserving. We recommend that you find a trustworthy recipe and follow it.
Fruit should be canned in a boiling water bath or a steam canner.
It is worth noting that fruit can be processed whole without added sugar, just keep in mind that the color, flavor, and texture of the fruit will degrade from the canning process.
Beans and other Legumes:
Beans should be soaked overnight before you start the canning process. When you’re ready to process them, strain the beans and add fresh water. Put them on to cook and let them simmer for about a half-hour.At the same time, you should get your pressure canner warming up. BEANS MUST BE CANNED IN A PRESSURE CANNER.
Pack your partially cooked beans into their jars, seal, and load them into the pressure cooker.
After the pressure cooker releases steam for 10 minutes, place the weighted gauge, and set your timer. Beans need about 75 minutes under pressure for pint jars and about 90 minutes for quart jars.
Once your beans are successfully canned, you will notice there is significantly less water in each can. This is normal! The beans just soaked it up while they finished cooking.
A Word About Dry Canning
Dry canning is a method of canning dry goods such as beans, cereal grains, dried fruit or vegetables, and even nuts for long term storage.
While this method has been used for generations, it is actually considered unsafe by the “canning authorities”.
Because of that, we won’t go into it in great detail here.
In brief, the concept is to seal off your dried goods from the damaging effects of air, bugs, and rodents inside of mason jars.
There are two primary ways that you can do this: the oven method or the Foodsaver vacuum sealer method.
The oven method requires you to heat your dry goods to 200 degrees Fahrenheit for about an hour and a half, packed into pre-sterilized, warm, and completely dry mason jars.
After they pass the specific amount of time in the oven, you put the lids on the jars and tightly close the rings. As the jar and the contents of the jar cool, the seal will form spontaneously.
This method of dry canning will kill off any bugs and larvae, eliminate any damaging moisture, and prolong the shelf life of your dry goods for years.
The vacuum sealer method takes advantage of electricity and technology. If you have a FoodSaver vacuum sealer, you will need to purchase the special attachment for mason jars.
This method requires no heating of anything. You simply place your food item inside of a clean, dry mason jar. Put the lid on the jar, but no ring. Use the vacuum sealer attachment to seal the jar and whoola!
Both of these methods are great for storing food that has less than a 10% moisture level. If you choose to dry can make sure the food can pass the “hammer test” and shatters upon impact.
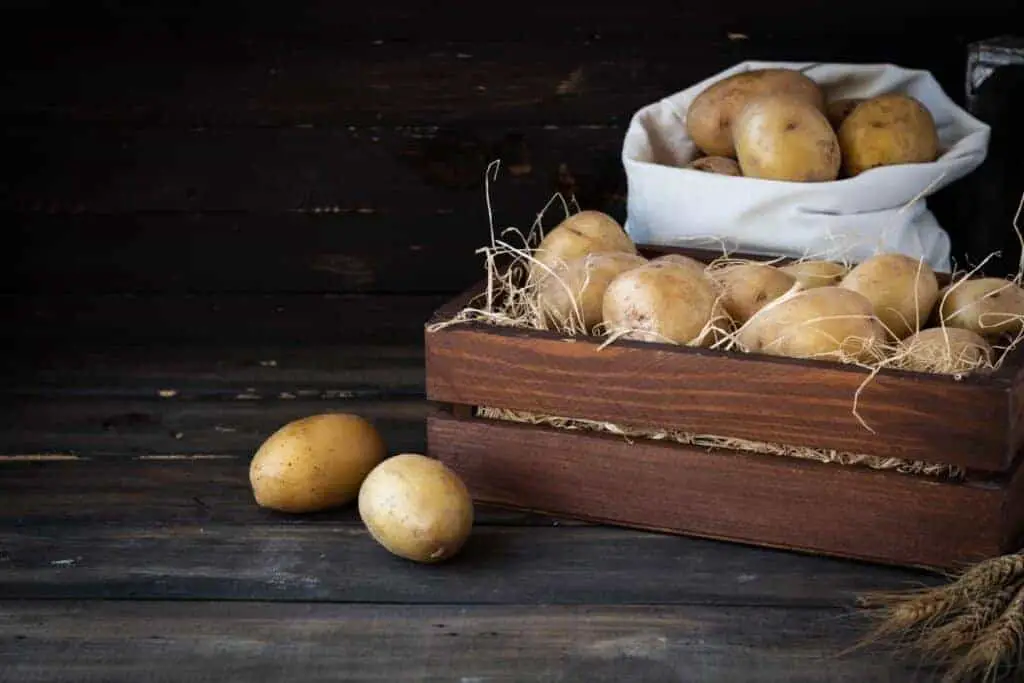
#4. Cold Storage
This is probably the easiest of the traditional food preservation methods, though it is not without its science.
Food kept in cold storage will not last indefinitely, but it allows you to keep some of your crops fresh until the next harvest comes in.
The most common forms of cold storage include your home refrigerator or outdoor cold boxes.
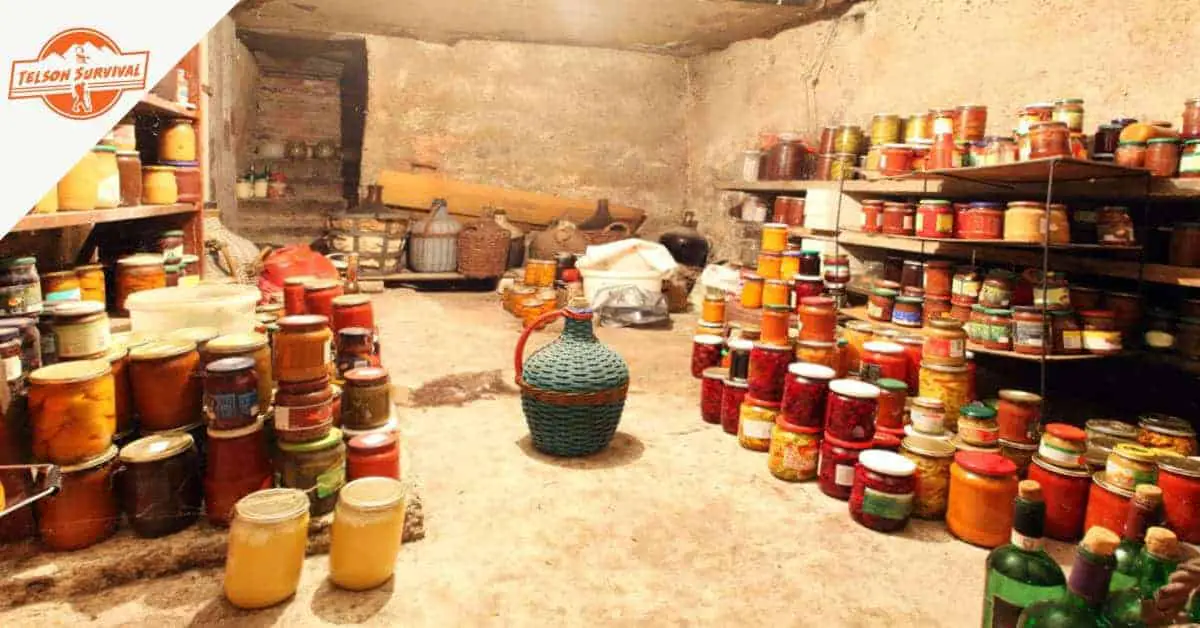
But when it comes to long term cold storage, the root cellar is king.
The Root Cellar
The root cellar is the easiest solution for storing your survival garden harvest. They have existed practically since humans invented agriculture, particularly in cold climates with strong winters.
Root cellars can be inside your home (usually in the basement), or they can be detached. They can be as simple as a hole in the ground or they can be complex feats of engineering. What they all have in common is that they are underground, or partially underground.
A root cellar takes advantage of the earth's natural cooling and humidity levels to keep your harvest fresh.
The Pros of Root Cellars:
Food stays fresh longer and is consumed with no prior processing.
Does not rely on electricity
Allows you to store large harvests of bulky crops.
Requires no technology
The Cons of Root Cellars:
The nutritional content of veggies diminishes after many months of storage.
Crops are more susceptible to pests.
Spoilage can happen if veggies are not properly selected for storing.
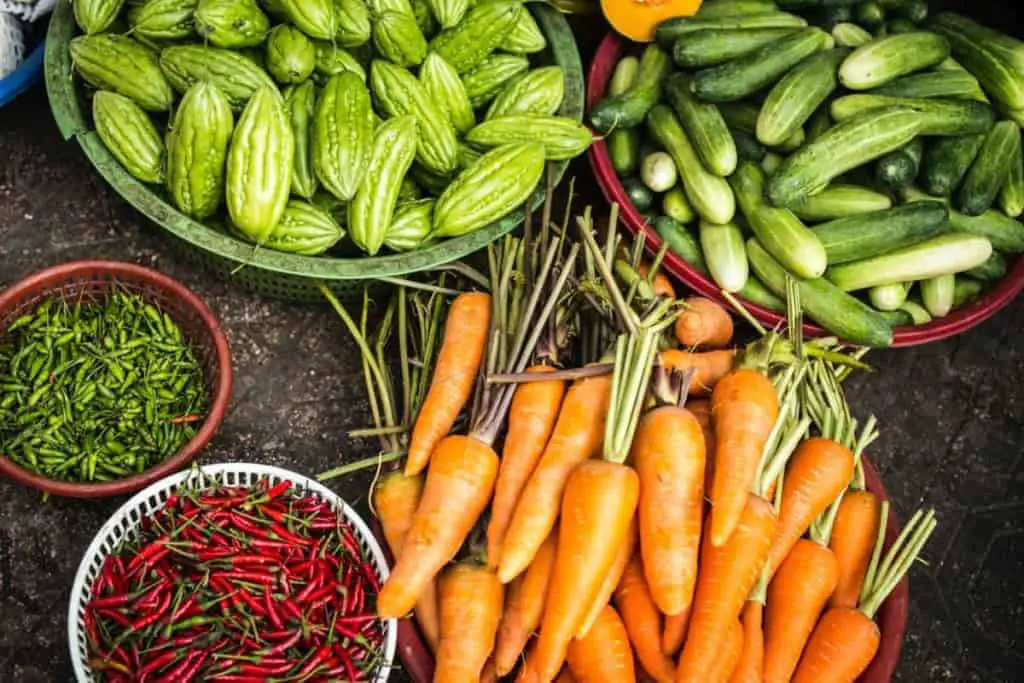
Root Crops: These are particularly suited for long term cold storage. Beets, carrots, celeriac, jerusalem artichoke, potatoes, onions, parsnips, turnips, rutabagas, winter radishes, and sweet potatoes are the most common veggies that are easily kept for long term storage in this traditional food preservation method. To increase your success with storing these root crops, choose varieties that are appropriate for this survival food preservation method. You should also research their specific temperature and humidity needs.
Fruits: Apples and pears are the most common fruits that are put up in root cellars. You can also store grapes, citrus fruits like grapefruit and oranges, plums, and quinces. Just like with root crops, each of these fruits has its preferred temperature and humidity level. Certain varieties will also store better than others.
Nuts: Nuts that you harvest or forage can be stored in cold storage as long as there is limited humidity.
Mushrooms: While you can’t exactly preserve fresh mushrooms in a root cellar, you can actually grow them pretty easily!
Other Veggies: Winter squash, cabbage, pumpkins, and even veggies like kohlrabi will also hold up well in a root cellar.
As mentioned, each type of food has a particular way of preparing it for long term storage.
Crops like apples last longer with careful packing and preparation. Others, like potatoes, just need the dirt shaken off. If you plan to use a root cellar to store your harvest, be sure to investigate the best methods for each crop.
Cold storage is also practical for bug out situations or survivalists in a wilderness setting. Digging a simple hole in the ground and constructing a rough cover can be done in just a couple of hours. Improvised root cellars can make a convenient hiding place for storing foraged foods.
Some Things to Keep in Mind about Root Cellars
Rustic root cellars (i.e., holes in the ground) are almost sure to attract rodents and other pests. Use caution when selecting and cleaning your produce before consuming it.
Well constructed root cellars, on the other hand, can be made impenetrable to pests through careful consideration in the construction phase.
Fruits should be stored away from vegetables. When fruits ripen they give off a gas that can cause your vegetables to sprout or go off. Fruits can also absorb the strong flavors of veggies like cabbage.
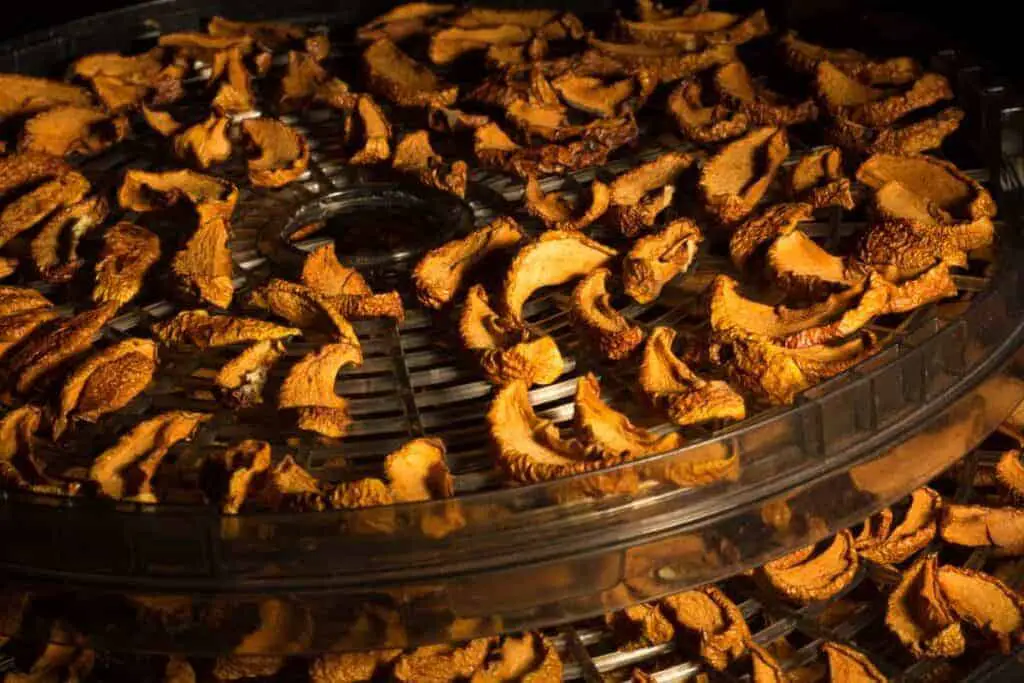
#5. Dehydrating Survival Food
Dehydrating is the best survival food preservation method there is. It’s the non-technical and completely off-grid way to put your food up.
Wilderness survivalists depend on dehydrating their meat and fish to prevent spoilage.
To the rural or suburban survivalists that have a survival garden, dehydration is absolutely necessary to preserve any and all of your beans, cereals, nuts, and other grain crops.
Anything can be dehydrated. Fruits, vegetables, culinary and medicinal herbs, even root cellar staples like carrots or potatoes, can all be dried down.
If done right, dehydrated food will keep for years.
The Pros of Food Dehydration:
Dehydrated food takes up less space.
Can be done for free and without complicated technology.
Dehydrating machines exist to speed up the work.
Works for every kind of food.
Can easily make portable survival food packs.
Dehydrated food can last for years.
The Cons of Food Dehydration:
Diminishes nutritional content.
Increases sugar and sodium content in food.
When done poorly or stored poorly, can lead to spoilage.
Different Ways to Dehydrate for Food Preservation
Food dehydrating is a traditional way to preserve food that can be really low-tech. Here are some of the common ways to dehydrate your survival food:
Automatic Food Dehydrators: If you want to get fancy, you can invest in a high quality food dehydrator. These can be a bit of an investment, but allow you to dehydrate your food in an enclosed and controlled environment. Foods that can be challenging to dehydrate through other methods, like juicy fruits, meats, and tomatoes are a breeze in an electronic dehydrator.
Smoke Drying: This is the best option for dehydrating meat, fish, and poultry. Smoke coats the meat, creating an acidic environment where bacteria cannot thrive. Simultaneously, the low heat from smoking embers thoroughly dries out the meat. Cold smoking can be done on the fly with an improvised smoking pit. It can also be done in a professional home smoker. Cheese can also be smoked, prolonging its shelf life and preparing it for safe aging.
Sun Drying: This traditional food preservation method requires only that the sun shine. For some climates, this can be a challenge. For others, this makes sun drying the cheapest (it’s free!), fastest, and most effective method of food preservation for survival.You will need at least three days of great weather to fully dry down most foods.
Off-Grid Dehydrating Systems: If you want to systemize your dehydrating system to allow you to preserve large amounts of foods, there are endless designs of food dehydrators that rely on solar energy or wood heat.
Some of these require simple construction plans while others can be improvised with what you have. These designs typically allow you to preserve more survival food than with a standard commercial dehydrator. The advantage is that they are fully off-grid.
Remember, when nothing is “normal” anymore, you will not want to count on an electrical dehydrator for your survival food preservation.
Last update on 2024-11-09 / Affiliate Links / Images from Amazon Product Advertising API
How to dehydrate your Survival food
Dehydrating Fruits, Vegetables, and Mushrooms:
Dehydrating your survival garden harvest for foragings from the forest is easy, though a bit labor-intensive.
Finely slice the fruits and vegetables you are going to be drying down.
Evenly place each slice over the surface of your drying racks or sheets of metal.
If you are not using an electric dehydrator, you should flip each slice of food when it is halfway through the drying process. This allows for faster, more even drying.
Dehydrating Meat, Fish, and Poultry:
Dehydrating meat can be really simple, or you can make it a fancy gourmet affair. It is recommended that you smoke your meat as soon as possible after processing it.
Sun drying is also an acceptable method of survival food preservation for meat, though it is recommended to smoke the meat for at least 6 - 8 hours first. This will make sure that your meat is preserved with all the benefits that smoke offers, without the need to maintain a fire for 2 or 3 days.
Slice your meat as finely as possible., ideally about ¼ in. thick or less. Remove any bones.
If you have salt available to you, rub each cut of meat with salt, or leave the meat soaking in a strong brine solution. If you want to get fancy, you can add spices and other seasonings to flavor your meat.
Place on the smoking racks. Follow your manufacturer's instructions if using a commercial smoker.
If using an improvised smoker, place your racks over the coals or slow fire. You can build a small hut or shelter to help maintain the smoke around the meat.
Remember, you want the meat to dry slowly with minimum heat. Avoid cooking it. This could take a few days.
If you choose to finish dehydrating your meat via sun drying, move it to a well ventilated, very sunny location.
It’s worth noting that meat that has a jerky-like consistency is a bit easier to rehydrate and cook with, while meat that is stiff and hard will store longer.
Dehydrating Grains, Cereals, Legumes, and Nuts:
If you are a survival gardener, or purchase bulk grains or beans from one, you need to know how to dry down the crops before putting them away for long term storage.
Drying down grains, cereals, every kind of bean, and even nuts is absolutely essential.
Any food of this sort should ideally be harvested during a spell of dry weather.
If you live in an area of consistently dry weather, plants can be left to dry in the field before being collected for further processing.
Once the harvest is in, you will need to separate the grains from the plant. This means husking the corn, shucking the beans, threshing the grain from the stalk, or hulling your nuts.
If the weather allows, spread the harvest on a flat, clean surface such as a cement patio or black plastic. Periodically rake the grains to turn them. This will allow them to dry down evenly.
When everything is fully dry (between 10 - 15% humidity) winnow it clean and prepare it for long term storage.
If needed, you can “finish” the dehydration process by using an actual dehydrator. This is particularly useful if you will be storing the grains via dry canning, in mylar bags, or in sealed buckets.
Check out this video for some food dehydrator recipes to get your homestead prepping started!
Dehydrating Medicinal Plants, Herbs, and Leafy Greens:
Dehydrating is the best traditional food preservation method to preserve your leafy greens, herbs, and medicinal plants.
You can easily dry vegetables such as kale, collards, chard, and celery. After they are dry, store them separately, or mix them with other dried herbs such as parsley, green onions, lovage, oregano, rosemary, etc. to create some fantastic seasoning mixes.
Even if you are foraging in the wilderness, you can use the sun to dehydrate your harvests for future use.
Here’s how you dry them down.
Spread your freshly harvested leaves on a fine mesh tray. Be sure to keep everything separate because some things will dry faster than others.
You can also create small bundles or bunches. Take care that they are not so dense that air can’t circulate through them.
Place in a warm, dry, area with abundant air circulation. It’s recommended not to place leafy greens in direct sun.
When they are dry enough to crumble, they are done. Package whole, or grind into powder.
Some Things to Keep in Mind About Survival Food Dehydration
Store your dehydrated foods in well-sealed, airtight containers. Dry canning your dehydrated goods is a fantastic option. You can also use mylar bags with oxygen absorbers. Another option for bulky foods would be sealed 5-gallon buckets.
Remember, the dryer the better for long term survival food storage.
Dried food can have a shelf life of several years, though after the first year you may notice a decline in quality and flavor.
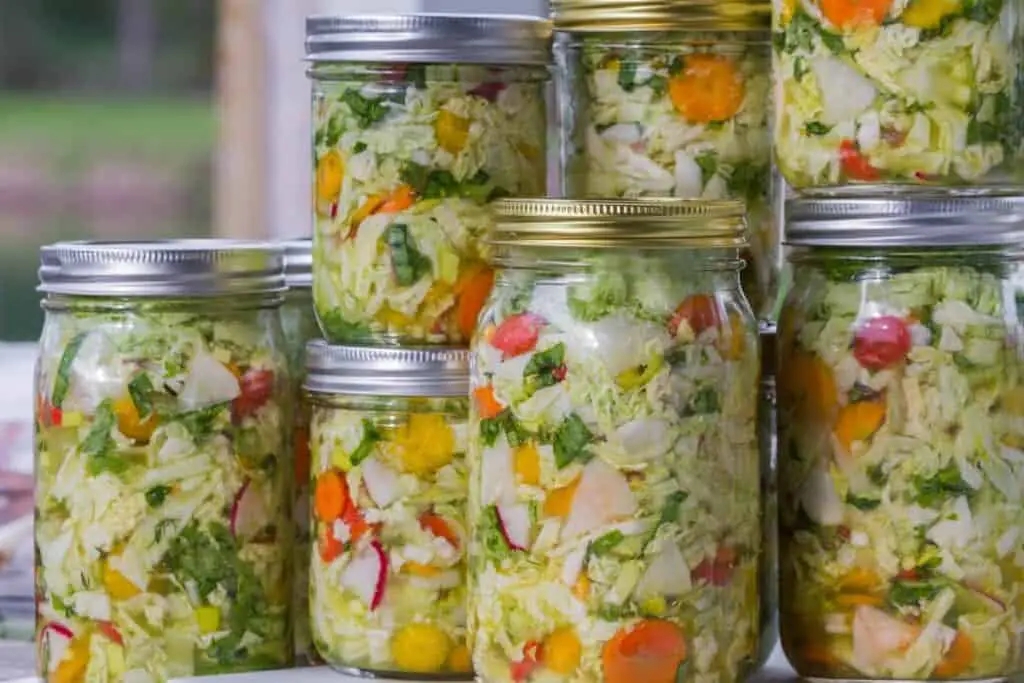
#6. Fermenting
Fermenting harvests is another of the traditional food preservation methods that people have practiced going back thousands of years.
The most well-known example of fermented food is sauerkraut. Lots of people eat that stuff but have no idea what it is or how it is made. They're shocked to find out that it is fermented cabbage.
If you have a good root cellar, you can keep your fermented foods for up to nine months or a year. Be sure to check on them periodically after the 6-month mark.
If you can, canning your fermented products can extend their shelf life for up to a year or more.
The Pros of Fermenting:
Adds nutritional value to your food.
Requires no electricity or fancy equipment.
Is beneficial for your gut health and immune system.
Allows you to create completely new products.
The Cons of Fermenting:
Does not universally work with every crop.
Is vulnerable to contamination.
Sometimes requires special ingredients.
Fermentation processes can be complicated for certain foods.
What Foods to Ferment and How
Fermenting Vegetables:
In terms of food preservation for survival, you will most likely want and need to ferment vegetables from your survival garden.
As mentioned, not every veggie should be fermented. These are the best vegetables for fermenting: beets, carrots, cabbage, large radish varieties, onions, and garlic. You can make some especially delicious recipes combining ingredients.
So how do you successfully ferment your summer harvest? There is a little bit of science to it, but anyone can do it.
Start by carefully washing the vegetables to be fermented.
Chop them to the desired size and pack into the container of your choice. Glass or ceramic is best.
Fill the container with salt brine.
Weigh down the veggies inside so that nothing is poking through the surface of the water.
Let sit at room temperature for 2 – 4 weeks then store in a cool location.
If you want to learn more about vegetable fermentation and the science behind it, we recommend checking out this in-depth explanation
Fermenting Meat:
Most people think that meat, when turned into sausages, is just “cured”. There is, however, a way to ferment your cured meat products with the addition of lactobacilli. These healthy bacteria contribute to creating an environment where harmful bacteria thrive.
Fermenting meat is a rather scientific process. Recipes must be carefully followed and special salts and nitrates must be added in addition to specialized bacteria starters.
Because of the complicated nature of meat fermentation, it is not an ideal method of survival food preservation.
Some of our most favorite beverages are a result of fermentation processes. While wine, beer, and cider are not exactly survival foods, it’s worth mentioning that they are made through fermentation processes using fruits and grains. Dairy can also be fermented to make yogurt and kefir. Heck, you can even use a soybean harvest to make fermented soy sauce, tempeh, or miso.
And who doesn’t love sourdough bread?
All of these fermented products have their unique processes. We recommend that you investigate thoroughly how to make each product before putting a portion of your survival food at stake.
There is a certain amount of trial and error that goes into each of these products. Because you are essentially playing with bacteria, a bad result could potentially make you ill.
Some Things to Keep in Mind About Fermenting
Some things are really easy to ferment, while other things are quite complex. Do your research.
Successful fermentation of meat, dairy, and alcoholic beverages requires specialized equipment, starter cultures, and other ingredients that may not be readily available after SHTF.
Preserving Survival Food: Eating Well Through Hard Times
Knowing how to store your survival garden harvests, foraged foods, and harvested meats is incredibly important. There is nothing worse than losing food to rot, mold, or bugs.
Survival food preservation is an essential part of your survival education, your homestead prepping and of course a key part in building your survival food stockpile.
If you feel overwhelmed by the possibilities, do what comes easy to you.
Take small steps forward in diversifying your food preservation strategy. Try dehydrating a bushel of apples before you commit your entire tomato harvest to the process. Make some sauerkraut before jumping into the world of fermented dilly beans or carrots.
As you gain confidence and experience, the diversity of what you eat will reflect your expanded knowledge.
Self-sufficiency, frugality, and ultimately, survival are worthy goals to work towards in every aspect of your life. Why not start with the food you eat and the food you will need to survive hard times?
We´ve created this comprehensive guide to help you understand all about freeze dried survival food. In this article we answer 16 questions preppers may have around freeze drying.
In this article we´re going to lay to rest any doubts or confusions preppers may have about freezing food. We´ll also let you know which are the best survival foods for freezing and how long you should keep them stockpiled.
In this article, we´re going to dig deep into the advantages of having a prepper freezer. We will also give you our recommendations for the best ones to store your food for long term survival.
We argue that storing meat without refrigeration is one of the most important skills every prepper needs to learn. In this article we talk about several methods to store meat long term even if you don't have a freezer.