In this guide to dehydrating food, we’ll cover everything you need to know to preserve your survival garden harvests, bulk up your survival food cache, and create homemade instant survival meals.
Telson Survival is a participant in the Amazon Services LLC Associates Program, an affiliate advertising program designed to provide a means for sites to earn advertising fees by advertising and linking to Amazon.com.
Telson Survival is supported by its readers. Please assume all links are affiliate links. If you purchase something from one of our links we make a small commission, at no extra cost to you. This helps us pay for the running of this website. Thank you for your support!
If you’ve been investigating the different methods of how to preserve survival food, you’ve probably come to realize that food dehydrating is the way to go.
No other method of food preservation is as easy and post-SHTF friendly.
In this comprehensive guide to dehydrating food for emergency preparedness, we’ll cover everything you need to know to preserve your survival garden harvests, bulk up your survival food cache, and create homemade instant survival meals.
This guide is so comprehensive and complete that we needed to divide it into three parts just to make sure we had room to cover it all. Consider this your complete prepper’s dehydrator handbook.
In this first part, we’re going to explain the science behind dehydrating and why it is so effective for preserving food. We’ll also explore the different ways that humans have been dehydrating food for millennia as well as examine the pros and cons of more modern methods.
In Part 2 we’re going to give you our recommendations on the best foods to dehydrate for prepping. We’ll explain, in-depth, how it all depends on what your goals are, and what food you have to work with.
And the best part - we’re going to fill your head with ideas and recipes on how to best use all your dehydrated food for true emergency preparedness. It’s one thing to dehydrate your food. It’s another to know what to do with it.
To wrap it up in part 3, we’ll delve deep into how to store dehydrated food for the long term. As you’ll see, dehydrating survival food takes a bit of work. Storing it adequately is fundamental for its (and your) long term survival.
When it comes to the shelf life of your food, your biggest enemy is invisible.
Microbes.
Microbes are all around us; bacteria, fungus, and mold are the most well known. And microbes love moisture and air.
For microbes to grow and thrive (and destroy your food) they need warmth, food, and most importantly - moisture.
This is why food dehydration is such an effective method for preserving food. By dehydrating your food, you are creating an inhospitable environment for future microbial contamination.
The ideal moisture content for your dehydrated foods is around 5 - 20% depending on the food. At this point, they are considered stable. This means that under the right storage conditions, microbes will simply not find the right environment and your dehydrated food should last for a really long time.
Does Dehydrating Food Ruin its Nutritional Content?
One of the most important reasons we grow, hunt or forage survival food is because we know that we need to eat a variety of nutrient-rich foods to protect our long-term health. We cannot just eat all protein, and we cannot live indefinitely off of potatoes.
For optimal health, we need to consume a broad variety of proteins, fats, sugars, carbohydrates, vitamins, minerals, and antioxidants.
When thinking about dehydrated food for preppers, we should be thinking about the best ways to conserve our survival food to preserve the most vitamins and minerals possible. So the question arises, does dehydrating food destroy its vitamin and mineral content?
The answer is both yes and no. Contrary to what you might expect, dehydrating your food is one of the best ways to preserve nutritional content when compared to other methods like canning.
Obviously, some nutritional losses will occur. The only way to get the maximum nutritional value from your food is to eat it fresh. In the process of dehydration, vitamins A, B, C, and thiamin are all diminished, but not destroyed. This is because they are all highly volatile, and react with the air and heat required for dehydrating.
Dehydrating foods actually concentrate the nutritional content of the food. By reducing its size and weight, you are concentrating calories, sugars, fiber, and certain minerals such as potassium and copper.
This is precisely why dehydrated foods are excellent survival foods. Basically, you get more bang for your buck.
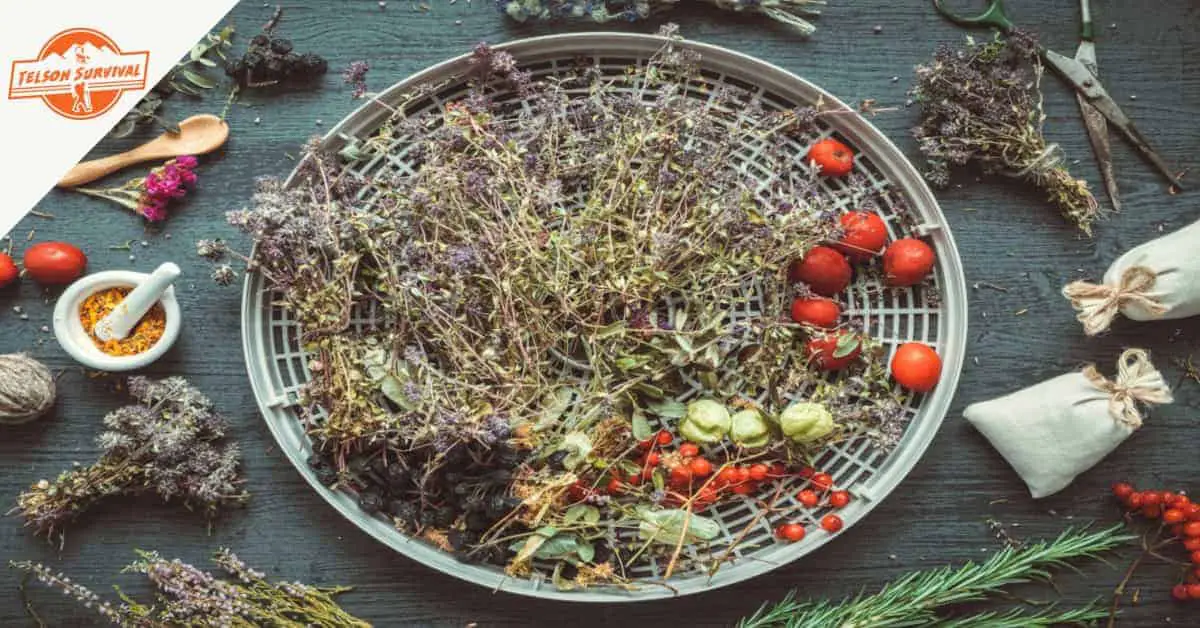
6 Methods For Food Dehydration
If you have read our Best Methods for Survival Food Preservation guide then you already know that there is more than one way to skin a cat when it comes to dehydrating your survival food.
Let's dig a little deeper into each of these methods:
#1. Automatic Electronic Food Dehydrators
These are an excellent option for urban or suburban preppers who live in an area where it’s simply not feasible to dry your food by another method. They are also great for those of you that value consistent quality in the final product.
The pros:
Offers a controlled environment to regulate temperature and limit environmental contamination.
Is not weather-dependent. You can dry your food rain or shine.
Is efficient for the fast drying of juicy foods like tomatoes, fruits, and meats.
Are easy to use.
Food is processed for consistent quality.
The cons:
Can be an expensive investment.
Have a limited size capacity.
Are electricity dependent and not practical for a post SHTF world.
Be sure to check out our opinion on the 5 best survival food dehydrators on the market. While a food dehydrator is not completely necessary to get started preserving your survival food, they are an excellent tool to have on hand.
Stay Prepared For Any Emergency!
If you like this article, consider subscribing to our free newsletter. We only send a few emails each month, with quality content related to Prepping and Survival, and absolutely no spam.
Thank you!
You have successfully joined our subscriber list.
#2. DIY Off-Grid Dehydrating Systems
If you are hesitant to invest in a commercial food dehydrator, need more space than they provide, or simply want to dehydrate food without electricity, then you will want to study up on alternative designs of survival food dehydrators.
The pros:
Will work after SHTF, requires no (or minimal) electricity and minimal maintenance.
Are custom built to meet your size requirements?
Should be designed according to your climate conditions.
The cons:
Require a little construction know-how.
May result in inconsistent drying, require frequent rotation of food or otherwise require frequent attention.
Solar Powered Dehydrators
The most common off-grid food dehydration systems are designed to harness solar energy.
Most DIY solar dehydrators will feature some kind of chamber or box that is designed to absorb sunlight and trap heat while simultaneously allowing for airflow through the unit. You can learn how to build a solar dehydrator easily enough… free plans are readily found online.
There are two types of solar dehydrators. You will need to decide which will work best for you.
Indirect Solar Dehydrators: These solar dehydrators collect the sun’s heat, and through a little simple engineering, transfer it to an enclosed area where the food is placed for drying.
As the name implies, the food receives no direct UV rays from the sun. Surprisingly, the drying chamber actually heats up more than a direct solar dehydrator, meaning that on average, food will dry out faster.
Direct Solar Dehydrators: Direct solar dehydrators are pretty simple and straightforward devices that dry your food out under the direct concentrated heat of the sun’s rays.
These designs provide a bit more protection to your food and shorten the drying times than simple sun drying (which we'll get to in a moment). The disadvantage of a direct solar dryer is that the UV rays from the sun are suspected to cause an increased nutrient loss in your food.
Wood-Fired Dehydrators
Wood-fired food dehydrators are really practical for those of you who live in northern climates and use wood heat. As anyone who has ever sat around a wood stove in the fall or winter knows, wood heat is drying heat.
To dehydrate your survival food with wood heat, you don’t actually need a special dehydrator.
You can simply hang certain foods above your woodstove to take advantage of the heat: bunches of corn, bundles of herbs and spices, peppers, and strings of mushrooms do not need any special infrastructure.
You can also improvise drying racks using common household items to take advantage of residual heat from warming your home, cooking on a wood stove, heating your greenhouse, or workshop once the weather turns cool or the days become short.
If you need to build a large capacity dehydrator, consider constructing a stand-alone model. These are amazing for processing large cool weather harvests from the orchards.
DIY Electric Dehydrator
You may decide that for the cost of a commercial electric dehydrator, you can design and build one yourself.
If you have a DIY attitude, you know that building your own electric dehydrator will allow you to make it the exact size you need. You can also adapt it to electrical specifications that allow it to function on limited capacity off-grid systems.
There are some great plans available online. We recommend the model made by Charles Sanders at Backwoods Home Magazine.
#3. Sun Drying
Sun drying is different from dehydrating your food in a solar dehydrator. Why? Because it's so much more low tech. To sun dry food, you simply spread it out in an area where it will get great sun and ample ventilation. Obviously, you need to live in an area where this is feasible.
Sun drying is a primitive survival food preservation method. It has been around for thousands of years. You can sun dry meat, fish, and any number of vegetables as long as the conditions are right. Just make sure to take care to protect your food from flies, dust, and other environmental contaminants.
The pros:
No special equipment is needed.
Will work post-SHTF
The cons:
Nutritional quality can be slightly diminished.
Dependent on good weather.
Takes longer to dry down food.
Keep in mind that sun drying can take up to three times longer than any other method. You need to be able to count on at least three days of warm, sunny weather to successfully dehydrate your food without electricity.
#4. Air Drying
This method is nearly the same as sun drying, except you actually want to avoid the sun. In warm climates where there is relatively low humidity, you can simply place your food in a warm, shady area that receives plenty of breeze.
Avoiding harsh UV rays results in a slower drying time, but generally results in a more "complete" dehydrated product. Vitamin and mineral content are less impacted by the drying process. This is an especially important consideration when dehydrating medicinal plants, herbs, and spices.
You can easily make or buy a handy hanging rack for air drying. These will help you keep even the smallest of leaves from being lost, as well as prevent dust or insect contamination.
Last update on 2024-12-11 / Affiliate Links / Images from Amazon Product Advertising API
The pros:
Protects the nutritional and medicinal integrity of your foods, herbs, etc.
Requires minimal investment in equipment.
Will work post-SHTF.
The cons:
Does not work for every kind of food, particularly “juicy” foods.
#5. Smoking
Smoking is a method of dehydrating food naturally that every prepper should know. This is a method of preserving food that is particularly helpful for conserving meat and fish.
In a post-SHTF world, a prepper needs to know how to preserve their meat naturally and without electricity.
The trick to successful cold smoking is to avoid cooking the meat. You need to keep the temperature under 90 degrees Fahrenheit. This is the preferred method for preserving larger cuts of meat.
You can also "hot" smoke, which requires the meat to get to at least 160 degrees. This is typically a faster process and is the preferred method for making jerky.
You will need to salt cure your meat first or let it marinate for at least 6 hours before smoking.
Depending on the size of the cut you will be smoking, you will need to keep the smoker going anywhere from six hours to 14 days.
The smoke has preservative properties that will cure your food and protect it from any environmental contamination. The consistent low-grade heat simultaneously reduces moisture levels.
All of this means that you will end up with well preserved, room temperature “stable” meat that you can store for at least a year.
Cold smoking is an amazing option for preserving fresh cheeses as well. Start with a well pressed, dry cheese, and put it on a smoker for a few days.
You'll notice that the cheese will become denser and form a nice "skin" around the outside darkened by the smoke. Smoked cheeses typically age really well under the right conditions, and can last almost indefinitely, getting better with age.
This method does not work well with fruits and vegetables for the obvious reason that the smoke strongly alters the flavor of the food you are preserving.
You might want to experiment cold smoking with peppers, garlic, or other veggies but should only do so to impart a smoked flavor to your food, not necessarily for long-term survival food preservation.
The pros:
Will work post-SHTF.
Imparts amazing flavor to the foods.
Requires minimal investment in equipment (though professional smokers can be quite handy though expensive).
The cons:
It takes a long time.
Does not work for every kind of food.
#6. Oven Drying
If you are wondering how to dehydrate food without a dehydrator, one of the simplest ways is to use an oven.
How do you dehydrate food in an oven? It's as easy as turning your oven on low and placing your finely chopped fruits, vegetables, or meat on a baking sheet or directly on the racks inside.
Make sure to periodically check on your food as it dehydrates. You may want to flip it over halfway through and turn the trays around to help everything dry down evenly.
The pros:
You most likely have an oven already in your home, so you don’t have to invest in any special new equipment.
It's a controlled environment and not dependent on the weather.
If you use a gas stove, it does not rely on electricity.
The cons:
It’s a limited capacity space.
Requires flipping and rotating the food to have even drying.
If your oven is electric, it can bump up your electric bill.
How to Dehydrate Survival Food
Before you actually dehydrate your first batches of survival food, you’ll have to decide which method you will be using. That’s step one.
Step two is actually understanding how to prepare your food for dehydrating.
The thing is, drying your food is the easy part. Getting it ready for drying is what requires the most work.
Preparing your food for dehydrating, no matter which type of food you are wanting to dry requires the following steps.
Inspect the food. You do not want to dry anything that is even slightly off. Inspect fruits and vegetables for bruises, rot, or mold. Cut off any and all damage you may find.
The same holds true for meat. Every cut of meat should be inspected for odd coloring or rancid smells. Be sure to cut off all fat.
If you plan on dehydrating pre-cooked foods to later convert into instant meals, avoid using leftovers. The food should be freshly cooked specifically to dehydrate.
It’s best to use only the freshest of foods to guarantee maximum nutritional quality and shelf life.
Prepare it for drying. All food should be sliced thinly. Meat should be no thicker than ¼ in. while fruits and veggies should be no thicker than ½ in. thick. A lot of veggies may need to be blanched.
Spread it out. Whatever you are dehydrating will need to be spread out evenly across your drying racks. Make sure nothing overlaps. If you are drying pre-cooked foods, be sure to spread them evenly across the try, no more than ½ in. thick.
Be sure to use appropriate trays. These can range from solid oven trays, fine mesh netting, or sturdy wire racks. The type of tray you use depends on the type of food dehydrator you have and the food you will be drying,
Monitor its progress. All food dehydrates at different rates under different conditions.
Just keep in mind that you should always monitor its progress for yourself. You can easily smoke meat to the point of turning it into leather. Juicy fruits can actually become as hard as rocks.
Pre-cooked rice can turn into complete mush on the inside and rock hard on the outside if it's spread too thick at too high of a temperature.
The best way to guarantee excellent results is to stay vigilant of your survival food and its progress in the dehydrator.
Next Steps For Survival Food Dehydration
Dehydrating your food is one of the best ways to preserve it and there are so many ways to get the job done. It is truly accessible to everyone because there is no need to make a large investment in anything other than your time.
At this point, you may be wondering… Ok, so...what comes next?
We´ve created this comprehensive guide to help you understand all about freeze dried survival food. In this article we answer 16 questions preppers may have around freeze drying.
In this article we´re going to lay to rest any doubts or confusions preppers may have about freezing food. We´ll also let you know which are the best survival foods for freezing and how long you should keep them stockpiled.
In this article, we´re going to dig deep into the advantages of having a prepper freezer. We will also give you our recommendations for the best ones to store your food for long term survival.
We argue that storing meat without refrigeration is one of the most important skills every prepper needs to learn. In this article we talk about several methods to store meat long term even if you don't have a freezer.