In this section of our Ultimate Guide to Dehydrating Survival Food, we are going to talk specifically about the best foods to dehydrate for long term food stocks.
Telson Survival is a participant in the Amazon Services LLC Associates Program, an affiliate advertising program designed to provide a means for sites to earn advertising fees by advertising and linking to Amazon.com.
Telson Survival is supported by its readers. Please assume all links are affiliate links. If you purchase something from one of our links we make a small commission, at no extra cost to you. This helps us pay for the running of this website. Thank you for your support!
As you well know by now, dehydration is an easy way to preserve your food. Whether you have an abundant harvest from your survival garden or simply found a great deal at the supermarket, dehydration is one of the best ways to set that food aside for the future.
As you start pulling your dehydrated foods off their trays and storing them away, you’ll inevitably start to wonder, how do I use this stuff? It’s one thing to preserve the food, but it’s a whole different game using that food to create delicious meals.
It’s amazing the variety of meals, snacks, and food products you can make from your dehydrated harvest.
In this section of our Ultimate Guide to Dehydrating Survival Food, we are going to talk specifically about the best foods to dehydrate for prepping and how to use it.
But before we get started, let’s talk first about the foods that you should not dehydrate.
When you start dehydrating your food, you are going to want to start dehydrating everything. Trust us, it will quickly become an obsession.
But, there are simply some foods you should avoid dehydrating altogether and others that you should dehydrate knowing that they will need to be consumed sooner than later.
High-Fat Foods
Here's the thing, fats tend to go rancid really quickly. It's not that you cannot dehydrate some of these foods - in fact, some of them are downright tasty (salmon jerky anyone??).
The following foods you can feel free to dehydrate, but remember that they will need to be consumed fairly immediately. They tend to have only a 2 week to 1 month shelf life. They make delicious snacks but won't work for long term storage.
This includes: fatty cuts of meat, oily fish, avocados, and nuts.
The following foods you should avoid dehydrating altogether because the result is just generally gross and can even be dangerous.
These include: milk, cheese, sour cream, other dairy products, and olives.
Store Bought Condiments
Ok, ok… you can dehydrate thick salsas and condiments. It’s actually pretty easy.
In the case of store bought condiments, it’s not so much a question of if you can dehydrate them, but rather, should you dehydrate them?
We give dehydrating sriracha sauce the seal of approval, but so many other condiments are loaded with salt, artificial ingredients, fillers, and who knows what else.
Unless the condiment that you want to dehydrate has an all natural ingredient list, it’s best to avoid it.
If You Can’t Live Without These Foods
If you can’t imagine life post SHTF without these foods, consider stocking up on the commercial options that are widely available.
Powdered butter, milk, and cheese are all readily available in stores and online. They are considered non-perishable and have a long shelf life. We recommend that you add these foods to your survival food stockpile.
If you want to preserve fatty cuts of meat or oily fish for the long term, consider canning them in a pressure canner. It will take up more space in the pantry but will help you meet your goals for long term survival food storage. Fat, after all, is a very important part of a survival diet.
As for condiments, consider making your own. There are some amazing recipes for dehydrated salsa, ketchup, and even the different kinds of tomato sauces.
As for olives, why bother? As it is, they already have a long shelf life in their original can or jar. Sure, you won’t be able to use them in your dehydrated survival meals, but there are so many amazing recipes (we’ll get to those in a minute) that we guarantee you won’t miss them.
The Best Survival Foods to Dehydrate
As you can see, there are actually very few foods that you cannot dehydrate. This leaves us asking, which are the best foods to dehydrate for preppers?
As preppers, our goals are a little different than those who are simply looking for a way to extend the shelf life of their food or make healthy snacks. Some of us have bountiful harvests from our survival gardens. Others of you are looking for a way to preserve your latest kill.
And many of you are simply looking for a way to deal with all the food you bought in bulk at a great discount. We need to preserve our food and a lot of it.
While we certainly enjoy making snacks, we are usually focused on getting the maximum shelf life out of the foods we intend to keep stockpiled for a long time.
Here are our recommendations.
Stay Prepared For Any Emergency!
If you like this article, consider subscribing to our free newsletter. We only send a few emails each month, with quality content related to Prepping and Survival, and absolutely no spam.
Thank you!
You have successfully joined our subscriber list.
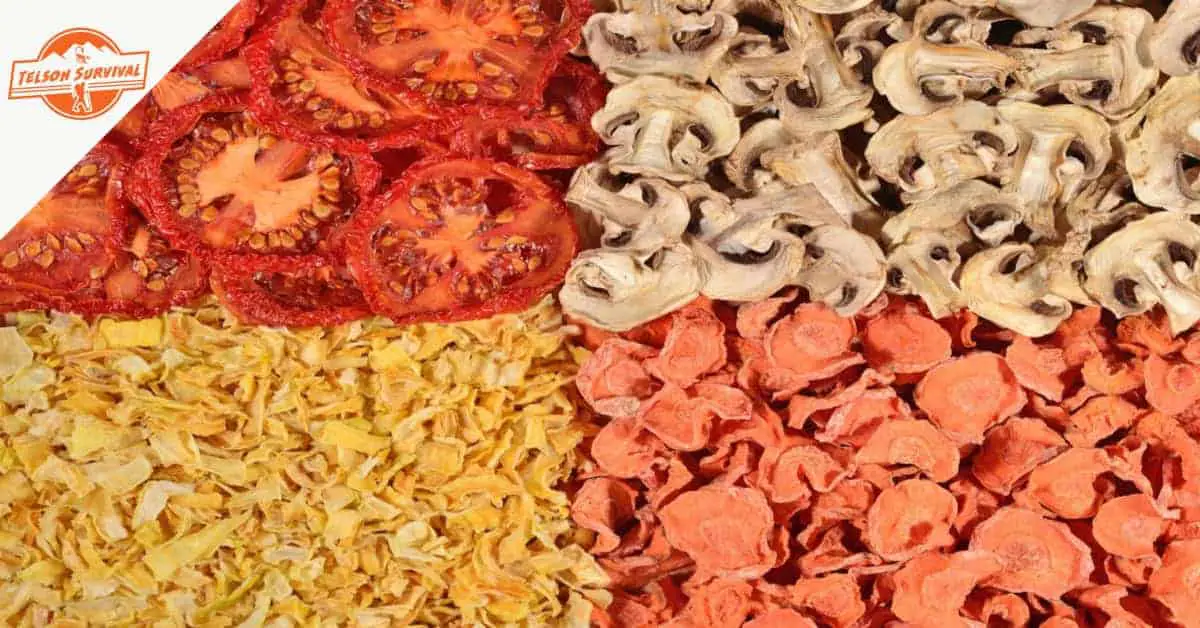
The Best Vegetables to Dehydrate
When you look at the recipes for homemade instant meals, certain veggies show up on the ingredient lists over and over again. These are the ones that you will want to dehydrate in large quantities.
Tomatoes
Onions
Bell Peppers
Garlic
Mushrooms
Potatoes
Zucchini
Squash
Carrots
Jerusalem Artichokes
Sweet Potatoes
All of these vegetables, when properly dehydrated, have an exceptionally long shelf life if stored correctly.
They are also incredibly useful in both whole and powdered form. They can be used to make an endless variety of sauces, dips, and soups.
If you have a survival garden, most of these crops are easy to grow and give abundant harvests, even mushrooms.
The Best Fruits to Dehydrate
Fruit is one of the best foods to dehydrate for snacks. There is nothing quite as tasty as biting into a dried slice of mango or apple. And who doesn’t love homemade fruit leather?
Unfortunately, not all fruits, particularly fruit leather, are appropriate for long term storage of more than a year. You need to be careful to investigate the ideal shelf life of each fruit and rotate them through your pantry to avoid them going off.
Here are the fruits that dehydrate the best and are frequently used in snack and dessert recipes.
Apples
Pears
Peaches
Grapes
Plums
Bananas
Pineapple
Mango
Strawberries
Blueberries
Raspberries
Blackberries
Dehydrated fruit is considered done when it is pliable yet leathery. You can also dry down the fruit to a crisp - where it snaps and breaks upon bending it.
At this point, you can powder the fruits and use them for flavoring smoothies, homemade ice creams, and other snacks.
Best Foods to Dehydrate for Prepping
As we’ve mentioned, as preppers our goals are a little different when it comes to dehydrating food.
It's great to have our pantry stocked with dehydrated fruits and vegetables. But we all know that when SHTF we are going to need something a bit more substantial to get through hard times. We may also want to focus on having ready-to-eat survival foods prepared for emergencies.
As preppers, there are two kinds of foods that you are going to want to be sure to dehydrate and have stashed in your survival food cache. These include:
Lean Meats
If you want to dehydrate meat for long term storage, it must be lean. Beef, chicken, and pork all have lean cuts. You can either dehydrate the meat jerky-style or you can pre-cook it and then dehydrate it for use in instant survival meals.
Precooked Grains and Legumes
You can cook rice, pasta, and beans of all kinds and then dehydrate them. You might want to ask yourself, “why bother?” but these foods are incredibly practical to have on hand and form the base of emergency meal rations.
They only require cooking for one to two minutes with boiling water to reconstitute in comparison to the 15 minutes to 1 hour required for the non-instant versions.
How to Re-hydrate Dehydrated Food
When it comes to rehydrating dehydrated food, the first thing you need to remember is that the food will never look the same as when it was fresh. This is especially true for fruits and meat. Check your expectations.
That being said, the process is simple. Simply soak the food you wish to rehydrate in water for up to an hour and a half. This time is shortened if you will be cooking the food immediately.
For instance, if you plan to make a soup, feel free to toss your dehydrated carrots, squash, and potatoes directly into the stockpot.
For pre-cooked, instant meals, you will typically only need to soak the foods for a few minutes before bringing them to a boil and cooking. Be sure to follow the specific directions for each recipe, however, because that's just a rule of thumb.
Be sure to use twice as much water as you have food. If you have a ½ cup of chopped dehydrated meat, put about a cup of water in it. If you accidentally add too much water, you can simply strain it off later.
Instant Survival Meals
Preparing instant survival meals with all that dehydrated bounty is one of the best preps you can make.
Emergency survival rations and MRE’s tend to be expensive.
You can make these meals using your own dehydrated foods for just a fraction of the cost. Heck, they're even cheaper if you are growing your own veggies!
Before we give you any recipes, there are a few things you should keep in mind:
When dehydrating meat, chicken, or fish for use in homemade MREs, you need to precook all of the meat. If you have a pressure cooker or Instant Pot, use it. The rehydrated meat will be more tender and palatable. Drain off as much fat as possible and then dehydrate it to the point that it can be powdered if necessary.
For sauces, you can pre-make and then dehydrate them. Use shallow pans or silicone trays similar to the ones used to make fruit leather. The alternative is to dehydrate and powder individual ingredients, blending them to create an instant sauce mix.
All rice, pasta, beans, and other grains or legumes should be precooked, drained, and then dehydrated.
Some veggies should also be pre-cooked and then dehydrated for optimal flavor and texture in your homemade MREs. This includes potatoes, carrots, peas, and other root vegetables.
Portion Control for Instant Survival Meals
When it comes to preparing your own instant survival meals, you will want to carefully consider your portion size. Remember, dehydrated food shrinks. You may be tempted to pack large portions.
Most people, however, will be just fine with a portion of 100 - 150 grams of dehydrated food, depending on what that food is.
For portions of this size, you will want to anticipate needing three individually packed meals per day per person.
As an alternative, you can prepare emergency survival MRE's that contain all the calories you need in a day in just one meal. If you prefer to go this route, you will need to plan for at least 2500 - 3000 calories per meal per person.
Storing and Using Your Instant Survival Meals
When it comes to storing your survival meals, you need to think carefully about how long you want them to keep and what your intended use for them is.
Short term storage
Will you be using your instant meals regularly and rotating them through your pantry? Will you be trekking regularly into the woods or practicing your survival skills? Are you looking for a convenient option to feed yourself or your family if the lights go out?
If so, then these foods can be completely pre-mixed and carefully sealed in a vacuum-sealed bag. The shelf life of these items should be about one year.
Long term storage
Is your goal to have your instant survival meals stashed indefinitely in your bug out bag, or packed away for long term storage? If so, you are going to want to package your food a little differently.
Food items should be packaged separately. When you open them, you can combine them before reconstituting. This will prevent complete loss of the meal if any one food item goes off (this can, unfortunately, happen with dried fruit and dehydrated meat).
You will want to use double packaging and include oxygen absorbers in the final packet to maximize shelf life.
Nutritional Profile
Your homemade emergency instant meals should contain a well-balanced mix of ingredients that will give you all the nutrients you need to get through the toughest of situations.
You will need to plan meals that have a balance of protein, carbohydrates, fiber, vitamins and minerals, and fats.
Because you cannot dehydrate fats or oils, consider purchasing real butter powder, nut butter packets, powdered cheese, or individual packets of olive oil to include in your instant survival meals.
Dehydrated Fruit Mix (this can be whatever fruits you have available to you of your preference)
Sugar
Cinnamon
Salt
Butter Powder
Presoak your oats before dehydrating them. Mix dried and crumbled oats with cinnamon, salt, and sugar to taste.
For short term storage, mix the fruit and butter powder together with the oats and vacuum seal. For long term storage, vacuum seal the oat mixture, dried fruit mix, and butter powder into individual packets.
To cook your food, mix all the ingredients together in a pot, and add water. Stir and let soak for five minutes before bringing the mix to a boil. Boil for one minute, stirring constantly.
Remove from heat, cover, and let sit for 10 - 15 minutes, stirring occasionally.
Sausage Flavored Beef and Grits
Ingredients:
Precooked and dehydrated coarse-ground grits
Lean ground beef
Seasoning Mix for each ½ lb. of ground beef: ½ tsp. Each of salt, pepper, dried basil - ¼ tsp. dried onion powder - 1 tsp. Dried sage - ⅛ tsp. Dried Marjoram and red pepper flakes - ½ tsp. Brown sugar
Dried Cubed Tomatoes
Precook your grits then dehydrate. Cook the lean ground beef with the seasoning mix. Drain off any fat, then dehydrate.
Break dried tomato slices into chunks.
For short term storage, mix everything together and vacuum seal. For long term storage, seal the grits and tomatoes into one packet and the ground beef mixture into another.
To cook your food, mix all the ingredients together in a pot and add water. Stir and let soak for five minutes before bringing the mix to a boil. Boil for one minute, stirring constantly.
Remove from heat, cover, and let sit for 10 - 15 minutes, stirring occasionally.
Lunch recipes
Beef and Mushroom Stroganoff
Ingredients (per serving):
½ cup Precooked dehydrated noodles
¼ cup Dehydrated ground beef
1 tbsp. Powdered milk
¼ dehydrated veggie mix with onions, bell peppers, and dried tomatoes.
1 tsp. Tomato powder
1 tsp. Mushroom powder
½ tsp. Dried parsley
½ tsp. Dried garlic powder
Salt and pepper to taste
½ tsp. cornstarch
Precook your noodles, strain, and dehydrate. Precook the ground beef, drain off the fat, then dehydrate.
Combine all powdered ingredients and seal them into a separate packet. This is your sauce mix.
For short term storage, mix dried noodles, beef, veggies, and individually sealed sauce mix into one bag and vacuum seal.
For long term storage, vacuum seal the noodles and veggies into one packet and the dried beef in another.
To cook your meal, add the pasta, veggie mix, and ground beef in a pot with 1 ¼ cup of water per serving. Let soak for five minutes before bringing to a boil and cooking for two minutes.
At this point, you will stir in the sauce mix, remove the pot from the heat, and cover. Let that sit for about ten minutes, stirring occasionally, before serving.
Mexican Chicken, Beans and Rice
Ingredients (per serving):
½ cup precooked and dehydrated rice
¼ cup of precooked and dehydrated chicken and/or black beans
¼ cup dried vegetable mix with dried onions, bell pepper, tomatoes, and corn.
Precook and dehydrate your rice, chicken, and/or beans.
Combine all powdered ingredients and vacuum seal into an individual packet. This is your sauce mix.
For short term storage, mix the dried veggie mix, rice, beans, and chicken together. Add the sauce packet to the bag and vacuum seal.
For long term storage, you can mix the beans and rice to vacuum seal together, but store the chicken in a separate vacuum sealed bag.
To cook your meal, add 1 ¼ cup of water per serving to the pot. Add all the ingredients except the sauce mix. Let soak for five minutes before bringing it to a boil.
Let cook for about two minutes and then remove from heat. Stir in your sauce mix, cover the pot and let stand approximately 10 minutes before serving.
More Prepper Food Dehydration Recipes
These are just a few recipes to get you thinking about all the healthy, nourishing, homemade emergency survival meals that you can make using dehydrated food.
These recipes are adapted from Chef Glenn’s recipes available at backpackingchef.com. We highly recommend that you check out the website for all kinds of free recipes to suit every taste.
Preppers Survival Snacks
When it comes to emergency food planning, you shouldn’t forget the importance of snacks.
Having something easy to eat, filling and nutritious, straight out of the package, is priceless.
And the options are endless when it comes to using dehydrated foods to create amazing survival snacks. Here are a few ideas:
Jerky
Jerky is a survival snack that every prepper should have stocked in their Bug out Bag, Get Home Bag, or emergency food supply. In a pinch, it can provide you with a serious energy boost. It's an excellent source of pure protein and will fuel you through intense activity between meals.
There are so many ways to make jerky. Entire books have been written about it. Everyone seems to have their own preferred recipe and there are endless tricks of the trade to be learned.
The basic process involves:
Select a cut of very lean meat. Trim off all visible fat and slice the meat thinly, against the grain. It should not be any thicker than ¼ inch. You might find it easier to slice the meat by partially freezing it.
Marinade the meat. Find a marinade recipe that inspires you and let the meat sit in it for a minimum of six hours. It's worth noting that the longer the meat marinades, the better the jerky will taste.
Put it on to dehydrate. Strain your meat and pat it dry before putting it on to dehydrate. Jerky is best made by smoking, in a dehydrator, or in the oven. It should take around 4 - 16 hours.
Be aware of the temperature. Meat should reach an internal temperature of at least 160 degrees.
You know your jerky is ready when it bends and cracks without breaking.
It is recommended that you store your homemade jerky in small portions by either vacuum sealing or in a Mylar bag with an oxygen absorber. Store it in a cool, dark location.
If you use a sodium nitrate cure when preparing your jerky you can expect it to last for at least a year, if not more. If you choose not to use a cure, expect your jerky to last only a couple of months.
Pemmican
This survival snack was a staple for Native American communities going back millennia. It packs a punch and will get you through the longest and most trying of days without a meal. It's a little sweet and a little salty and provides you with much needed fats, proteins, and sugars.
There are many different ways to make pemmican, but here’s the basic idea:
Dry your meat as if you were making jerky but skip the marinade (you should still salt the meat). Dry it to the point that it breaks.
Grind the dried meat to a fine powder.
Dry a selection of berries and grind them into a fine powder as well.
You will need a small amount of tallow or fat that will solidify. This should be beef tallow, though you can also use coconut oil.
Heat the fat so that it melts, and mix it with the meat powder and berry powder. You should use a ⅙ ratio of fat to powder.
Work this into a stiff dough and form into balls or patties.
You can store your pemmican in small portions in vacuum sealed bags. Because there is a lot of fat in this “snack”, you will want to take extra care to package it in a way that protects it from oxygen.
Pemmican should last up to a year if stored correctly. Keep a package in your Bug Out Bag, Get Home Bag, or in a survival cache on the way to your bug out location.
Want to learn more about pemmican and recipes for it? Check out our guide on how to make pemmican at home.
Other Dehydrated Survival Snacks
There are so many great options for easy-to-make dehydrated snacks. We highlighted jerky and pemmican because they are tried and true survival foods.
Other options, like fruit leather, trail mix, natural chips, or granola bars can all be made at home using dehydrated foods. Your options are only limited by your creativity.
Survival Supplements, Natural Medicines, and Herbal Teas
When we think about dehydrating food, we most often think about it as a way to preserve foods that we like to eat.
But what about dehydrating things that are good for us? Things that we might not like, but that our bodies need.
Think about liver...it's an incredible source of folate and iron. It's exceptionally rich in b vitamins, vitamin a, and copper. It's even considered an anti-inflammatory food.
But do you like it? It's most likely that it's not your favorite cut of meat (even though we know there are some die-hard liver and onion fans out there).
Here's an idea for you: Take that liver from your latest kill, or on special from the butcher shop, and dehydrate it. Dry it down to the point that it can be powdered. And there you go… you have an all-natural dietary supplement that will help you meet your nutritional needs.
You can always store your powdered liver in a jar and take it by the spoonful. You could also invest in some empty gelatin capsules that you can fill using a specially designed spatula.
Liver capsules are just one example of a survival supplement that you can make with dehydrated food.
Here’s a different recipe shared courtesy of Milla Ezman of Siberian Cedar Land for an herbal multivitamin drink mix that you might want to copy down:
Ingredients
5 oz Rosehips
3 oz Alfalfa
3 oz Hawthorn Berries
3 oz Dandelion Leaf
3 oz Dandelion Root
3 oz Nettle Leaf
2 oz Bancha Leaf Tea
2 oz Astragalus Root
2 oz Lemongrass
2 oz Horsetail
1 oz Milk Thistle Seeds
1 oz Ground Turmeric
1/2 oz Yellow Dock Seeds
1/2 oz Nettle seeds
1/2 oz Nettle root
A lot of these ingredients can be foraged for or easily grown in a survival garden.
After harvesting, dry each ingredient down by your preferred method and then pass it through a grinder. Sift each ground herb to eliminate large stems or whole seeds.
Mix everything together and store in an airtight container. A mason jar that you can vacuum seal after each opening is your best option.
Consume two to three tablespoons daily by mixing in water, adding to smoothies, or sprinkling on soups or salads.
Through dehydration, you can preserve countless herbs that are useful for treating all kinds of ailments as well as supporting your overall health.
When SHTF, hospitals might not be your best bet for getting better. Pharmacies might not have the medicines you need. Knowing how to dehydrate and prepare basic natural medicines should be considered an essential survival skill.
Spice Mixes and Rubs
So while we’re talking about dehydrating herbs for medicinal use, we should also talk about dehydrating herbs for culinary use.
If you have a survival garden, dehydrating your herbs is the best way to extend their shelf life. With a variety of different herbs and spices, you can make some amazing spice mixes and rubs for your meats.
We recommend that you air dry any herbs and spices to protect their flavor and nutritional content. After everything is dried down, powder it and store it in a glass jar. Most spices will last for up to a year before their flavor starts to degrade.
Homemade Alternative Flours
Another thing worth throwing out there for your consideration is the option to make homemade alternative flours with your dehydrated foods.
We recommend investing in a simple grain mill such as the Wonder Mill or an inexpensive hand crank model to get started.
Last update on 2024-07-12 / Affiliate Links / Images from Amazon Product Advertising API
You can easily make nutritious flours from the following grains, nuts, and roots:
Corn
Wheat
Amaranth
Barley
Rice
Acorns
Almonds
Chestnuts
Lambs Quarter or Wild Quinoa
Mesquite pods
Cattail roots
Jerusalem artichokes
Kudzu
This is just a partial list of foods that you can process into nutritious flours. Depending on where you live, you may be able to cultivate or forage for many of these foods.
We recommend that you investigate the best way to process each food into flour. Not every food is as easy to process as simply dehydrating and then grinding it up.
To store your alternative flours, you will want to package them in airtight containers. If you have canisters that can be vacuum sealed, you can extend their shelf life even further.
If you have a freezer, feel free to stick those flours in there to get the maximum shelf life possible.
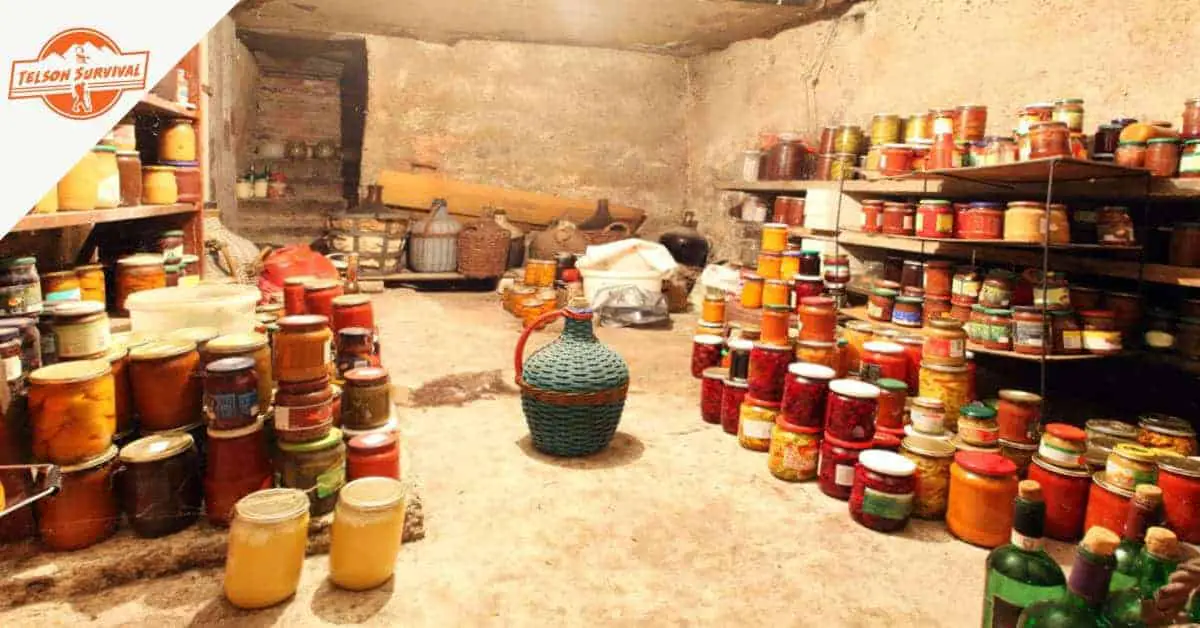
How Do I Store Dehydrated Food?
There certainly are a lot of great ways to process your dehydrated survival foods. The possibilities are seemingly endless and you are only limited by your creativity.
We hope to have inspired you to stretch beyond what you already know to try something new.
In part 3 of our Ultimate Guide to Dehydrating Survival Food we are going to explore how to store dehydrated food for long term survival. This may be considered the most important aspect of survival food preservation.
We're going to take a look at the best techniques and tools to get the job done and will discuss how long of a shelf life you can expect different dehydrated foods to have.
We´ve created this comprehensive guide to help you understand all about freeze dried survival food. In this article we answer 16 questions preppers may have around freeze drying.
In this article we´re going to lay to rest any doubts or confusions preppers may have about freezing food. We´ll also let you know which are the best survival foods for freezing and how long you should keep them stockpiled.
In this article, we´re going to dig deep into the advantages of having a prepper freezer. We will also give you our recommendations for the best ones to store your food for long term survival.
We argue that storing meat without refrigeration is one of the most important skills every prepper needs to learn. In this article we talk about several methods to store meat long term even if you don't have a freezer.