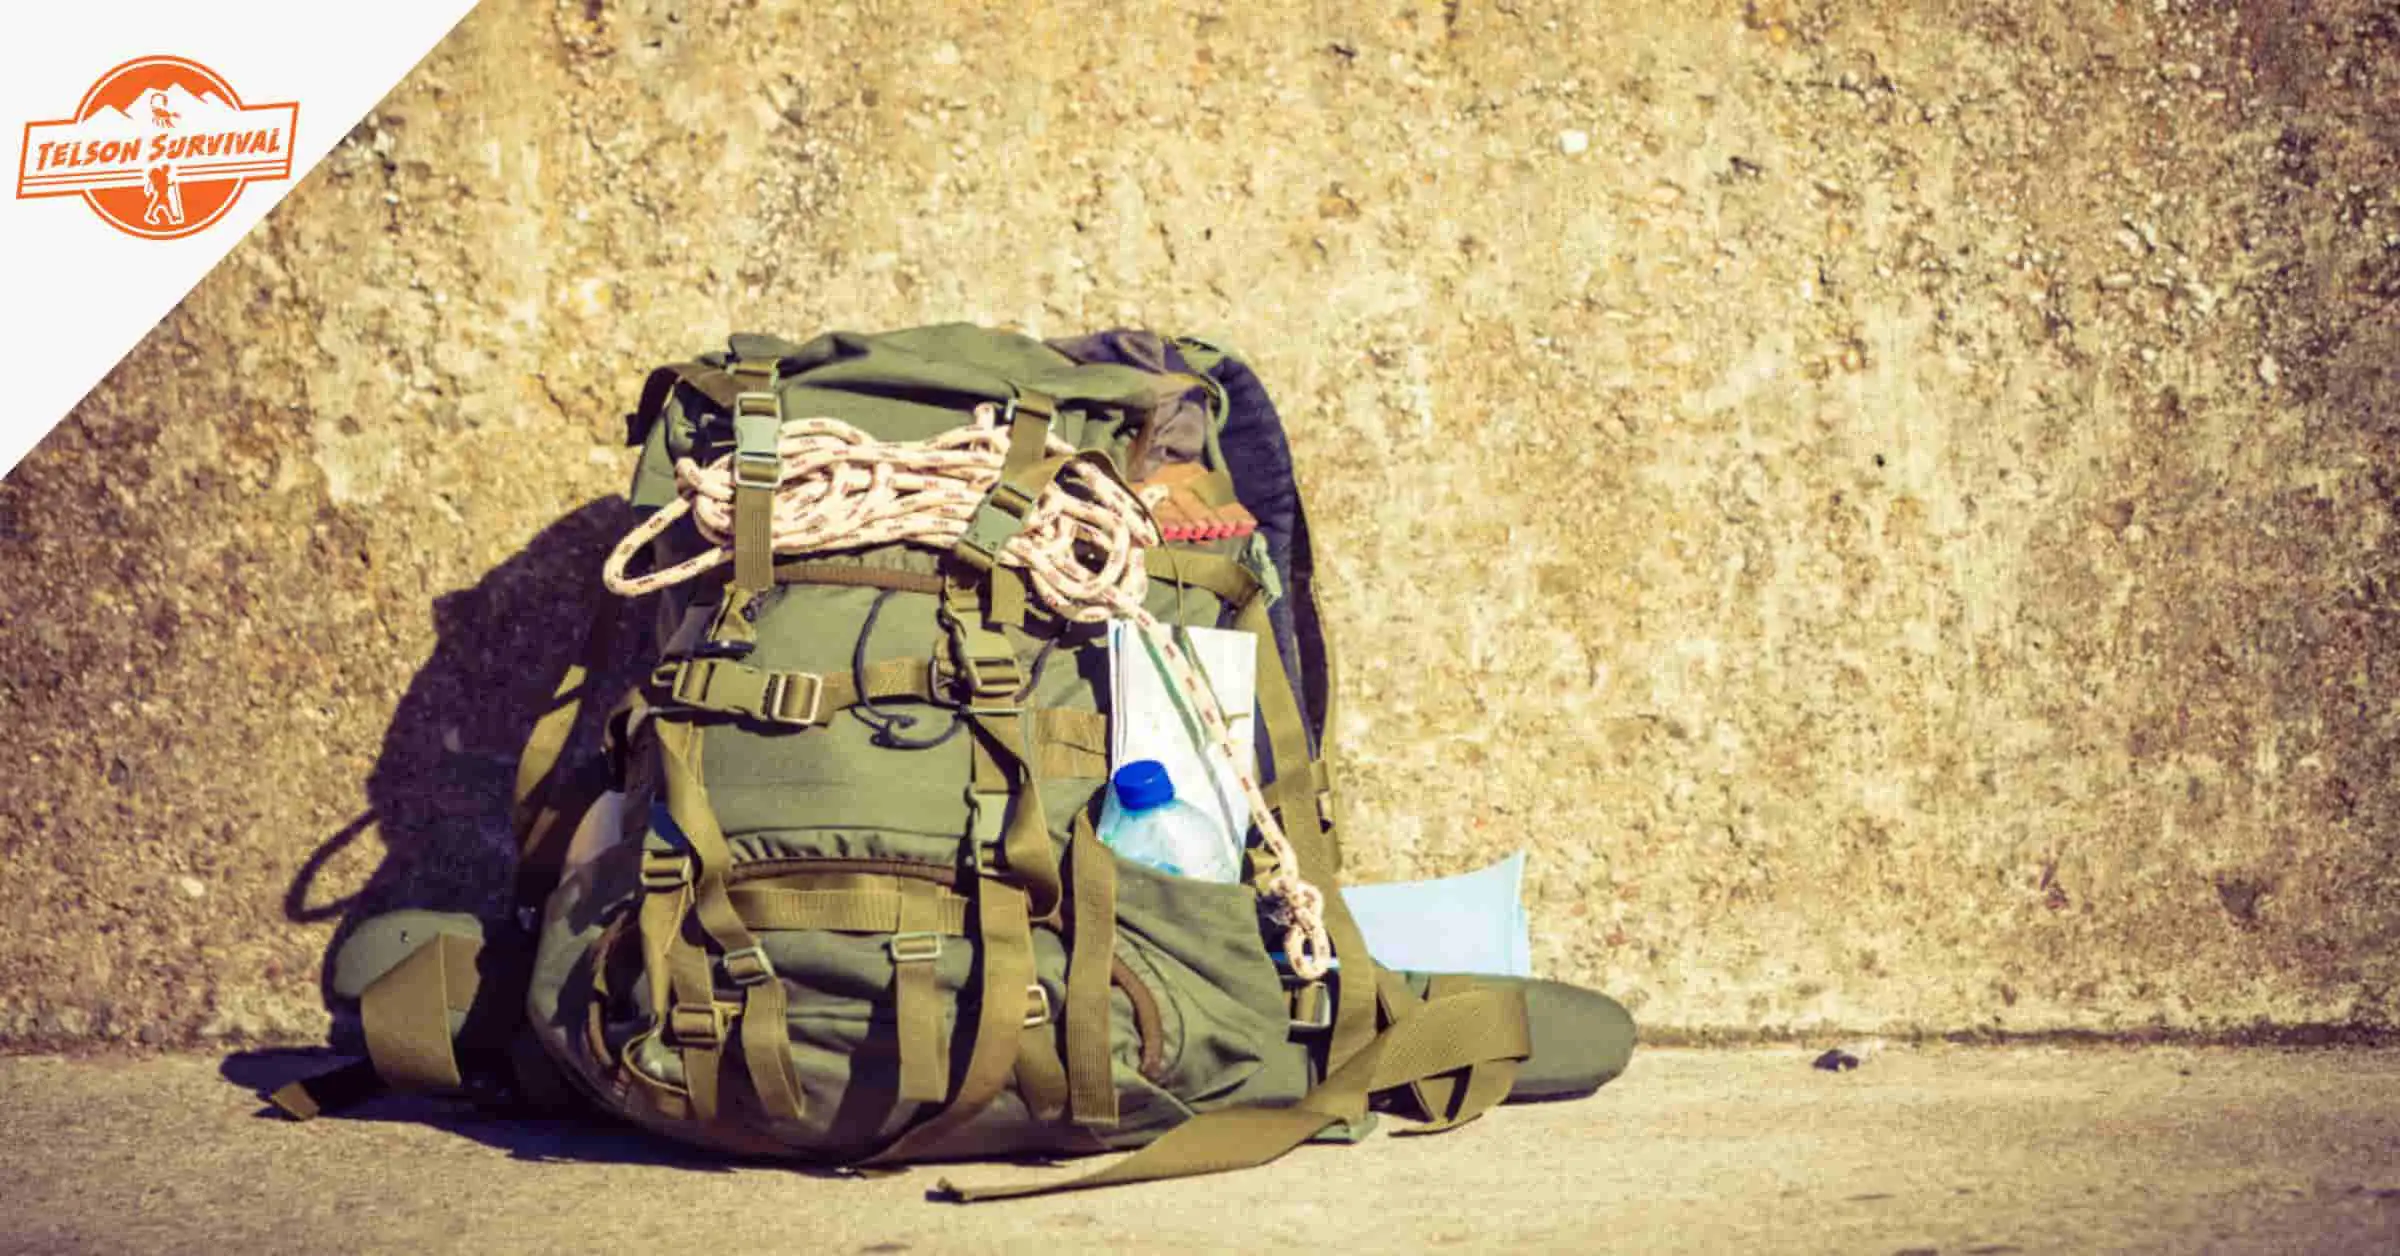
Paracord has become a survivalist sensation owing to its superior physical properties. It is strong, elastic and lightweight and can be used in emergency situations to bandage wounds, hunt for food or rescue others.
Telson Survival is a participant in the Amazon Services LLC Associates Program, an affiliate advertising program designed to provide a means for sites to earn advertising fees by advertising and linking to Amazon.com.
Telson Survival is supported by its readers. Please assume all links are affiliate links. If you purchase something from one of our links we make a small commission, at no extra cost to you. This helps us pay for the running of this website. Thank you for your support!
Paracord has become a survivalist sensation owing to its superior physical properties. It is strong, elastic and lightweight – perfect for carrying on a wilderness trip or even around the town.
It can be used in emergency situations to bandage wounds, hunt for food or rescue others.
There are a huge number of neat projects you can do with paracord: from fashioning bracelets and belts, to making snow shoes, rock slings and shelters.
Once you have read just how many uses paracord has – you’ll never leave the house without it.
The name “paracord” comes from parachute cord, first introduced by the US military as the suspension lines of a parachute.
The most common type of paracord is the 550, which essentially means it can withstand a load up to 550lbs (or about 250kg if you prefer it that way).
It is exceptionally lightweight: at just under seven grams per meter length it is the perfect accompaniment to outdoor adventures and daily life.
If you're interested in our paracord brand recommendations, check out our guide for the best paracord for survival.
Construction and Materials
Its exceptional tensile strength is primarily due to its construction.
There are typically seven to nine inner strands of three core yarns, twisted evenly.
These are then encased in an outer sheath of up to 36 interwoven strands.
Good quality paracord is composed of multiple sets of inner strands.
The best material is nylon, which can resist rot or the growth of mildew, and can be used in all types of weather.
It is an elastic material, capable of stretching up to 30% of its initial length before breaking.
In recent years, due to the rising popularity of paracord, manufacturers have started using plastics such as polyester as a replacement to nylon.
Whilst this is more cost-effective from a manufacturing point of view, it cannot offer the same quality and versatility as nylon. Something to think about when making a purchase.
How does paracord help in survival situations?
There are a number of things you can use paracord for in emergency situations, from medical to hunting to survival situations.
Here are some of the most useful things you can do with paracord.
Paracord as a tourniquet
Tourniquets are only to be used as a last resort, in the case of extreme and uncontrollable bleeding. Often, applying a tourniquet means saying goodbye to the bleeding limb as you will cut off circulation completely.
Follow these steps:
Braid the paracord into at least an inch (2.5cm) width. You don’t want to braid it too thin and risk lacerating your skin as you tighten it. As this is an emergency situation, you will want to braid it as quickly as possible; or better yet have a pre-braided length of paracord in the form of a belt or bracelet. More on those items a little later on.
Wrap the paracord around the bleeding limb – above the wound – and tie a loose knot. Insert a stick or pen into the knot and tighten so it is secure.
Turn the stick to tighten the tourniquet. You should keep tightening it until the bleeding slows and ultimately stops. Use more cord to tie off the stick or secure it in some way, so that it retains pressure without you touching it.
Paracord as a splint
If you are out in the wilderness and you break a bone, or injure a muscle or joint, you may well find yourself immobilized.
This type of injury may seem less severe than an open wound, but if you cannot move yourself then you may eventually face life-threatening problems such as dehydration, hypothermia or heat exhaustion; depending on where you are.
Splints help to ease the pain and increase your mobility so that you can seek help. Here’s how to use your paracord accordingly:
Lay a shirt or jacket under the injured limb. This just helps to cushion it against the ground and act as a physical barrier for dirt, if you have any open wounds in the area too.
Lay a hard object such as a pole or stick to brace against the limb. If you do have open wounds, secure the first with sterile gauze and try not to brace anywhere near them.
Wrap the paracord around the limb, jacket and chosen brace. Tie a secure knot that will keep the items in place; but not restrict the blood flow. You want to tie a knot above and below the injured joint, or above at below the nearest joints for a bone injury.
Double or triple up the cord for extra stability. Utilize as much of the cord as you can to keep the splint from slipping or falling off.
Paracord to make a fire
If you are out in the woods and have forgotten your matches or lighter (or they have been lost or dampened), then you can use sticks and paracord to make a fire.
This technique – often referred to as the “bow drill” technique – can be a little tricky so should ideally be practised in advance.
Use your paracord to tie both ends of a relatively flexible but strong stick. This is the bow you will use to generate heat to start a fire.
Choose a dry piece of wood and make a notch in it. Place some flammable material, like dry grass, in this cut.
Fashion another stick into a spindle with a pointed end. Wrap a loop of your paracord bow around this spindle, in the center.
Place the pointed end of the spindle into the notch with the flammable material. With your left hand, hold a rock on top of the spindle. This will keep everything in place.
Using your right hand, quickly move the bow back and forth. This rapid movement will create friction between the pointed spindle end and the notch in the wood, which should hopefully generate heat and sparks, and set your flammable material alight.
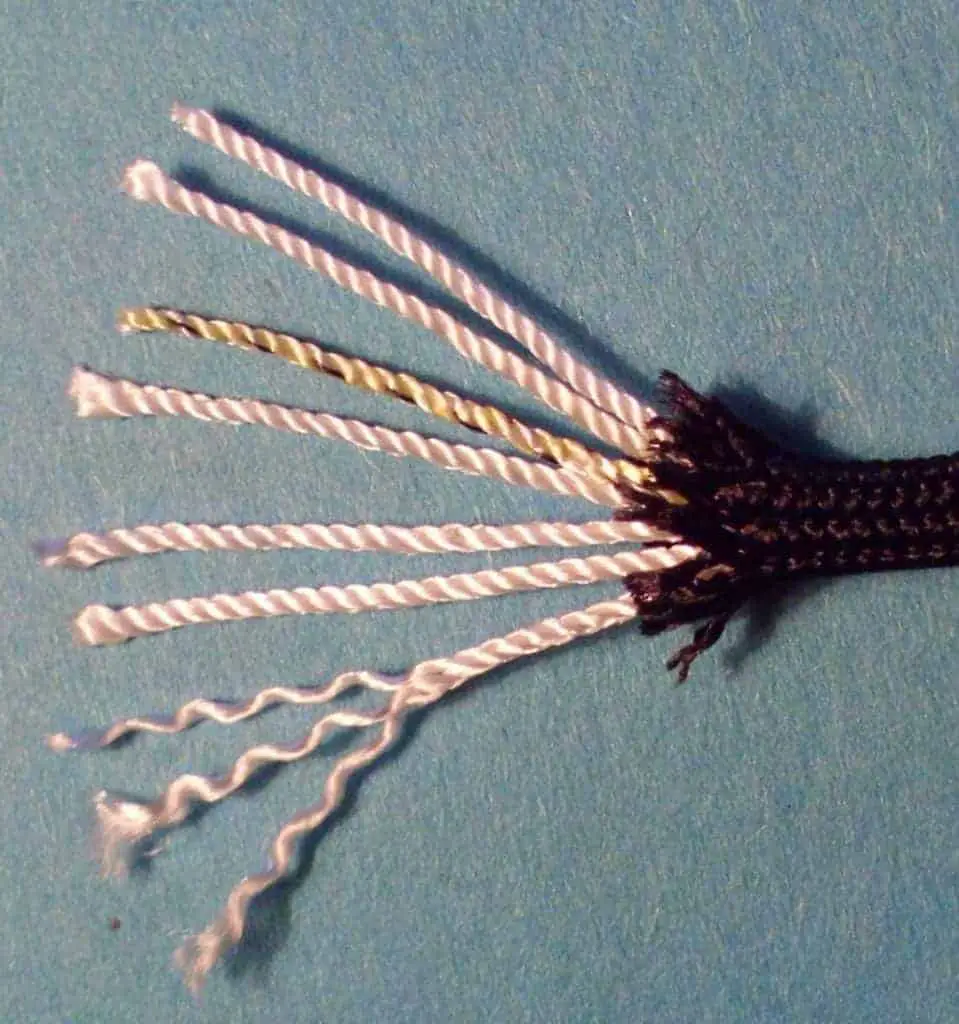
Paracord as a fishing net
Nets are an efficient way to catch fish if you are near a river or stream. Using the currents to your advantage you can catch a quick and easy meal by using your paracord:
Cut the paracord to the length you want your net to be. This will depend on the width of the river and how much cord you have available, but anywhere between five to ten feet should suffice.
Carefully separate the inner strands from the outer sheath. Watch the video below for the best way to successfully gut your paracord.
Place the inner strands horizontally and the outer sheath vertically. Tie the corners where the inner and outer strands meet.
Tie the inner strands to the outer sheath at both edges, with a spacing of 2-3 inches. Then repeat this in the opposite direction, but tie a knot every time you overlap each strand. This will create an interlocking weave and your net will start to take shape.
Watch this video for the best way to successfully gut your paracord.
Paracord as a rescue line
Due to their strength and elasticity, paracords make excellent rescue lines should someone fall into water or enter quicksand, and need immediate assistance.
As quickly as you can, tie a figure-eight knot in the paracord and throw the line to the victim. Take a few seconds to make a few loose coils in one hand – this will help keeping the cord in-line when you throw it.
Always throw 1-2 meters upstream if the victim is in moving water. This will ensure that the person can reach the line and it does not float away from them downstream.
If you can, tie a floating object to the end of the line if the victim is in moving water. Something such as a life jacket, cooler lid or even a nearby log. This will help to add weight to your line and will aid the person in distress.
Stay Prepared For Any Emergency!
If you like this article, consider subscribing to our free newsletter. We only send a few emails each month, with quality content related to Prepping and Survival, and absolutely no spam.
Thank you!
You have successfully joined our subscriber list.
Essential Knots For Paracord
To exploit the full range of uses for paracords, it is essential to know a few simple knots and hitches to be used in a range of scenarios. To practice these, you will need a length of paracord or string, and an eyelet or key chain ring.
For all knots, we recommend heading to Animated Knots for more examples of useful knots and how to tie them.
Figure-eight knot
This knot is an excellent stopper not, yet is non-binding so easily undone. It is very quick, simple and should be known by anyone carrying paracord.
Pass the tail over itself to form a loop
Continue under and around the standing end
Finish by passing the tail down and through the loop. Pull to tighten.
Ideal for: Stopping any line running through a holding. It is commonly used in climbing and sailing.
Two half-hitches
Arguably the easiest knot there is, this one uses two half-hitches and is a great quick-fastening knot. It is only to be used in situations where you don’t need to quickly release your knot, as it pulls very tight and secure.
Thread the paracord once through the ring
Wrap the paracord around the outside, creating a loop, then pull through that loop. Pull tight.
Repeat the above steps to achieve the two half-hitches
Ideal for: Hanging goods from a tree, for instance as bear-proof storage for your food.
Slippery Hitches
This is an ideal knot for situations where you’ll need to untie your hitch fast. While it is secured to your post, loop or other item: this hitch is amazingly strong.
However, as soon as you remove your item, just a single pull on the paracord will loosen it.
Lie your paracord flat and make two loops inverse to one another.
Thread the left loop through the right loop.
Work the right loop tight, leaving the left loop free. The right loop is now a simple knot.
Fasten the loop around your item. Pull tight.
To loosen, simply take the loop off your item and pull both ends of the paracord. Your slippery hitch is now undone.
Ideal for: Making a spare tent line. Place the loop around the hooked end of your tent pole.
Clove Hitch
This is an ideal temporary hitch for suspending or tying-off lines, such as at a boat morning. It is a quick, convenient hitch but is non-binding so do not rely on this hitch for heavy loads – it can easily slip.
Create a loop in the working end of the paracord.
Place this loop over your post or pole (alternatively, make the loop directly over your object).
Create an inverse loop and place that over your post or pole, and pull tight.
Ideal for: Temporary attachments to pole or ring.
Timber Hitch
If you are out in the wild, you may find yourself having to tow a log or a raft over land or afloat on the water. This is a secure hitch which performs well so long as the knot is kept under tension.
Pass the end of the paracord around the log and then up and around the standing end
Tuck between the log and the cord then repeat twice more. The three turns will be gripped against the log.
Ideal for: Floating a log or supplies across water, or dragging wood to your camp.
Top paracord projects
Transporting big bundles of paracord around with you is not ideal, especially if out in the wilderness where your pack weight really matters.
Instead, there are all sorts of ways that you can fashion your paracord into useful, everyday items that won’t look out of place.
This means you can easily have a lot of paracord on your person when you go into town, into the wilderness or even in the house – always ready for an emergency situation.
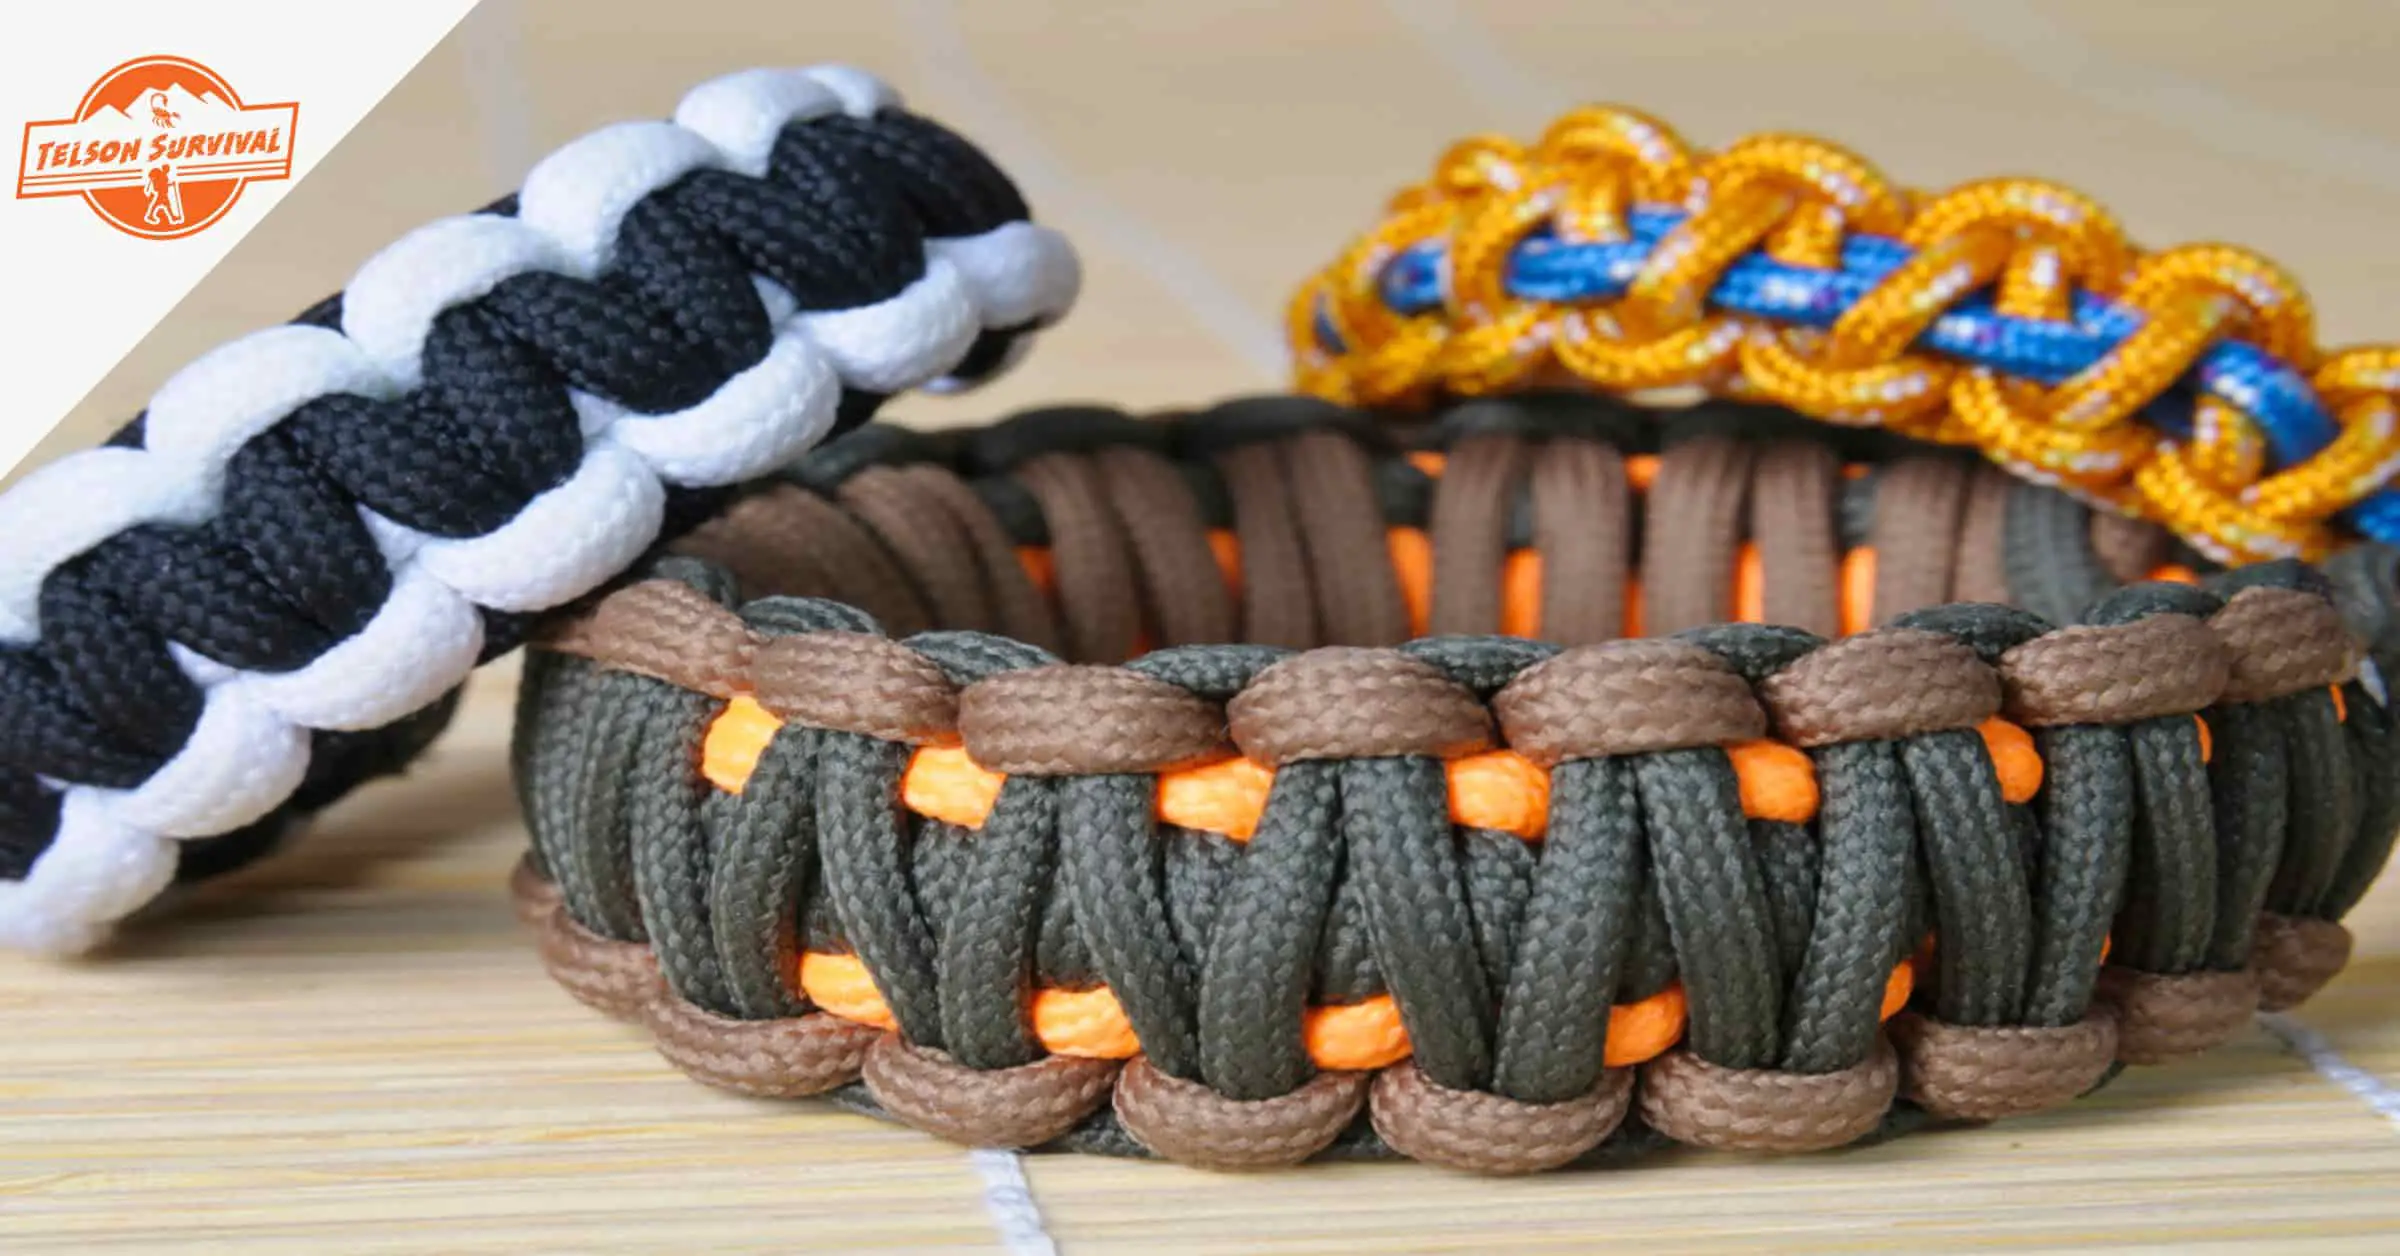
Some popular paracord items include: bracelets, belts, straps, key chains and more.
Paracord braiding
Braiding is a great way of packing a lot of length into a short area, plus it looks more stylish than just a single cord. Here are a few simple paracord braiding techniques:
Paracord Fishtail Braid
If you’re someone who has spent a long time braiding hair, then you may already be familiar with this braid. It’s a very popular style and easy to achieve with a little practice.
Start with three lengths of braid, two of of which should be the same length and the third should be longer.
Fix the two equal strands to your chosen belt buckle (or other item) so that they will not move. Fix the third, longer strand at one end of the buckle, leaving the other end free
Take the longer strand and weave it over and under the left cord, then up through the center of the two. Then repeat on the right cord. Pull it tight with each iteration, and repeat this until you have braided all the way to the other side of the buckle.
Pull the loose cord tight, trim the excess and slightly melt the end to stop it fraying. You can then tuck it in between one of the braids or loops on the buckle to hide the end.
Paracord Cobra Weave
This is another simple, popular style of braid for belts, bracelets or key chains. For this, you’ll need just a single length of cord.
Find the center point of your cord and fold it to create two equal length. Push the center through your buckle or ring, then push the two ends through the loop: creating a secure cow hitch.
Lie the buckle and two lines flat and straight on a table. Take the left section of cord and bring it underneath both cords, leaving a loop on the left hand side.
Take the right section of cord and bring it under the standing end of the left cord, over the two cords and down through the loop you have just created. Pull to tighten.
Repeat this on the right hand side. Make sure you tighten the cord well.
Continue this down the length of your cord, remembering to alternate each time so that it doesn’t start to twist.
Check out this instructional video by Weekend Gunners for an easy cobra weave bracelet.
Paracord bracelets
Arguably the most important fashion accessory you’ll ever have – this one could save your life!
Most people make them with a simple buckle or clasp, and the weaves are quick-releasing should you need to unravel it in an emergency.
There are a whole host of neat tricks, designs and colors you can use to make the perfect survival bracelet.
How to make a paracord bracelet
Here are step-by-step easy paracord bracelet instructions. You will need:
- 10ft of 550 paracord (nylon) - A buckle (choose the size that is right for you) - Scissors - Ruler - Lighter or matches
Fold your paracord in half. Push the folded loop through one side of your buckle, and bring the two standing ends through the loop to create a cow hitch. Pull tight.
Put the two loose ends through the other side of your buckle, and move this piece down the cords until it is the desired length for your bracelet (check this by fastening the bracelet onto your wrist).
Detach the two buckle halves once again and move the loose end one inch further up the cords, to give a little more space.
Lay your bracelet flat, with one loose end on either side of the buckled-down section
Cross the left cord over the middle, leaving a loop. Bring the right cord over the left, under the double cord section and up through the left loop. Pull tight. This is the cobra weave as we mentioned earlier. Alternate sides and repeat this along the length of your bracelet.
Once you reach the end, cut both of the loose ends about ¼ inch away from bracelet itself.
To finish, burn the cut ends with a lighter or match to melt the ends. Don’t hold it too close – you don’t want the cord to burn and smoke toxic fumes. While the ends are still hot, press them into the bracelet with the plastic of your lighted to cement them against the cord, and stop them slipping through the knot.
There you have it, your first paracord bracelet!
Check out Paracord Planet for more variations on the cobra weave paracord bracelet.
Paracord survival belt
In extreme survival situations, a longer length of paracord will be much more useful.
Bracelets are a neat way of carrying 8-10ft of cord, but with a belt you can carry over 50ft and even up to 100ft, depending on the weave you use.
You can use the weaves we have already mentioned to make a decent paracord belt, but to make a survival belt you will want to use a method that enables a quick-release, should you need it.
We recommend using Slatt’s rescue weave. This can unravel 100ft of paracord in just a few seconds and can be made with or without a buckle.
How to make a paracord survival belt
You will need:
- 50-100ft 550 Paracord (nylon) - Strong belt buckle - Scissors - Knitting needle or skewer - Lighter or matches
Determine how much paracord you will need by measuring your waist size. For a 32” waist, you will need approximately 50ft of cord.
Thread one end of your cord through the buckle, as many times as it will fit comfortable. Tie a simple overhand knot at the short end to secure it and pull tight. Melt the short end so it does not work loose.
Take the longer, unmelted end and make a loop with it. Then pass the loop under the four buckle loops you have just created. Make sure your loop is a few inches wide, and that the continuing end of your paracord is at the top.
Use your knitting needle to create three more loops by pulling the top strand of the cord through the gaps in the buckle loops. This will shorten the side loop you have just created and you should end with four evenly-sized loops.
Place your finger through these four loops and, with the other hand, make another loop with the long end of the paracord. Thread this loop through the finger loops and tighten.
You should now see a pattern emerging. Continue this method of finger-weaving until you have used all of your cord / the belt is at the right length. Make sure to adjust and tighten the loops each time so that the belt is taught and untwisted.
When you reach the end, run your last four finger-loops through the other end of the belt buckle, and create one final through-loop. Weave this loop through the through-loops to secure around the buckle end.
Cut the paracord with a 1/2 inch to spare and tie another overhand knot to secure, melting the end again so it doesn’t unravel.
Watch this video tutorial of a slatt’s rescue weave belt using paracord, done by Paracord Weaver.
Other Cool Paracord Projects
Paracord key chain with a secret compartment
Attach a small length of paracord to your keys with an in-built secret compartment.
This is perfect for stashing extra cash, emergency matches and other small essentials you can think of. Learn how to make it with DIY Projects.
Paracord snow shoes
Paracord is an excellent material for making emergency snow shoes.
Thanks to its elasticity, it makes the perfect webbing for the net which will provide you with the right surface area for waking on snow.
Ever been out on the trail and snapped a shoelace? Keep your boots firmly on your feet by replacing the broken lace with paracord.
If the original cord is too thick to fit through the eyelets on your shoes, then gut the cord and use the inner strands instead.
Paracord as fishing line
If you are running low on food or have forgotten or lost your fishing line, the inner threads of paracord can be the perfect width for catching fish.
You could also fashion it into a simple fishing jig.
Check out this video tutorial on making a lure from paracord, from IntenseAngler.
Paracord to repair torn clothing
If you’re out on the trail and slip, or come into thick undegrowth, you may easily tear your protective layers of gear.
This can quickly lead to you becoming cold and even hypothermic, if you are in extreme rain or cold.
Find a small, strong stick to fashion into a needle and use the inner strands of paracord to sew up the tear.
Paracord to make a raft
After days of prolonged rain in wild backcountry, you may not be able to cut your way back along the trail you came.
Areas may be flooded, or rivers wider and much faster-flowing than they were before.
Using just a few survival knots and buoyant logs, you can quickly craft a raft to float your belongings – and even yourself – across the water to safety.
Paracord sling
Perhaps you encounter a dangerous animal, or need to hunt for food in an emergency.
Using a small length of paracord, such as that from a bracelet, you can fashion a simple yet effective rock sling to use as a weapon.
Paracord is the perfect material due to its combination of strength and elasticity.
Check out this video tutorial and how to make a paracord sling, done by TryingItAllTogether.
Best Paracord For Survivalists
When choosing paracord for survival situations, it is important to make sure that you choose the right material, number of strands and loading weight for your needs.
The strongest paracord is made of nylon. In some cases, polyester can perform just as well but is not as strong and therefore not as useful in extreme scenarios.
“Milspec paracord” is a superior class. ‘Milspec’ stands for “military specification” and meets requirements as laid out by the US military. Research a trusted brand before purchasing true ‘milspec’ paracord.
Choose the right number of internal strands. Type III paracord has seven internal strands, while Type IV contains eleven. Naturally, the Type IV can hold a greater load, but comes at a higher cost. The 5Col Type III is a popular choice among survivalists for its combination of strength and lower cost.
Choose paracord with internal tinder strands. These paracords contain an internal strand of paraffin-waxed jute, which can be used as a firelighter. The UST ParaTinder is a popular model with survivalists for this reason.
Paracord is an exceptionally versatile material with a seemingly limitless repertoire of uses.
Whether at home, in town or out in wild country; paracord should be carried with you wherever you go.
So, practice your knots and fashion a belt or bracelet as you never know when you will need it - and it might just save your life one day!
A flare gun is a pistol-like device that fires flares for signaling or illumination in emergencies. This article will help you decide what the “right” flare gun is for preppers!
Urban, suburban, rural, and wilderness preppers should all study and master survival foraging. This basic foraging guide will get you thinking about finding survival foods in the wild.
No stone will be left unturned as we explore everything preppers need to know about smoke grenades. What are the best to buy and should you keep them in your Bug Out Bag?